Easter Island is somewhere that you feel like you know but once you get there, you realize there’s so much more to it. It’s a place that has nothing to do with the holiday, it’s so far from the next populated island yet had a flourishing civilization, and is small in size, but its people managed to carve massive monolithic carvings that have lasted the test of time.
In this 9 day Easter Island, we set the record straight on the best way to do it, navigating the latest rules to the national park, making sure you see all of the most important moai statues, and ultimately help you plan the adventure of a lifetime.
Read more about Chile
Looking for a deal on car rentals?
- Hotels – With Genius tier, you can save 10-15% on Easter Island properties on Booking.com. We stayed at Takarua Lodge.
- Car rental – You won’t be able to rent from the standard car rental companies. We created a whole guide on how car rentals work on Easter Island.
- Guides – In order to visit the main sights, it’s mandatory to have a guide now. We’ve partnered with Green Island Tours to provide you a great deal. Keep reading to find out what it is!
- Travel insurance – If something happens, you want to make sure you’re covered, especially with the closest major hospital being over 2,000 miles away, you want to make sure you pick the best travel insurance for your trip and also Medjet in case you need a medical evacuation back home.
- Flights – We have an insane hack on how to save hundreds. Don’t miss it in our article on how to get to Easter Island!
Here’s what we’re covering:
Easter Island Trip Planning
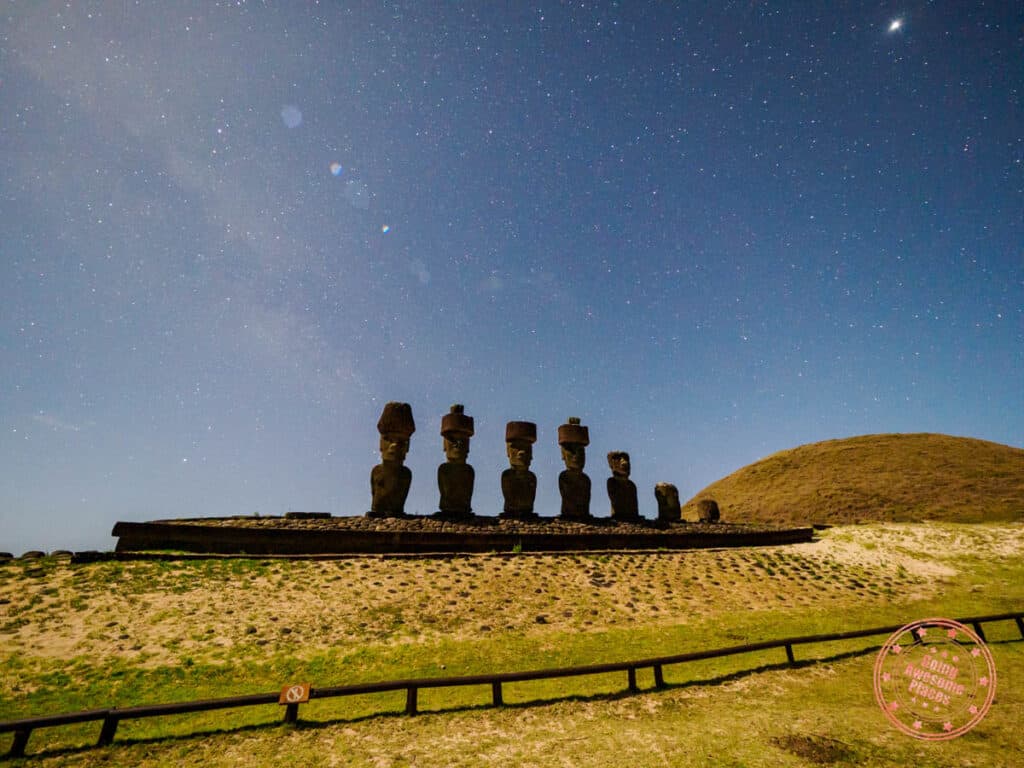
Before we begin, let’s quickly go over how this itinerary works, how it was created, and where you can find our complementary guides to give you everything you need to plan your trip.
Background Of This Itinerary
We spent over a month in Chile and Easter Island was the last major leg of the trip, completing the triangle of Patagonia, Atacama, and Easter. We don’t think there’s an official name behind it, but locals we met called it the Chilean golden triangle.
This part of the trip is was planned very similarly to the 6 day Atacama itinerary where we wanted to do it as independently as possible.
In our initial research, it seemed like 3-4 days was the most that people were spending on the island. However, since Easter Island had just opened back up to tourism from the pandemic (2022), flights with LATAM were quite limited (they still are but getting better) and we were either looking at a really short trip or something a bit more extended. We ended with the latter.
Another thing we learned from planning this trip is that a lot had changed from pre-pandemic which is why we wanted to make sure all of the updated information could get into the hands of those that needed it.
As we cover in our mega visiting Easter Island travel guide, you can only visit the main archeological sites within Rapa Nui National Park with a guide which meant coming up with a hybrid itinerary where we started the trip with a few tours and then rented a car to explore on our own.
Everything You Need To Know About Travel to Easter Island
No detail is spared. This is the must-read Easter Island travel guide. Thank us later 😉
Visiting Easter Island Guide
How To Use This Itinerary
When you compare this to our 10 day Patagonia itinerary, 5 day Maui itinerary, 6 day Banff in winter itinerary, or 6 day Smoky Mountains itinerary, this one is quite similar. We’ve put a lot of time and energy to focus on the smaller details that most guide books and websites miss.
This Easter Island itinerary goes through what to expect from each day, day summaries, and links in case you want to learn more. We won’t include details for every single attraction as most of the details can be found in our article for the top things to do on Easter Island but if there’s something we want to point out, we’ll certainly have it there.
After the breakdown by day, we’ll also provide ideas for alternatives that you could swap in, an idea of cost, and the type of traveller this itinerary is for.
Since we understand in trip planning that it’s hard to see where things are in relation to each other, there’s also a custom Google Map which you can create a copy of and use for your own use.
Lastly, we also have a Google Sheet of the itinerary that you can download if you sign up to be an Insider. We’ve created this to be a template and inspirational guide but is by no means the only way you can see Easter Island. Feel free to take the pieces that you’re interested in and rearrange things as you see fit.
What You Need To Know Before Planning Your Trip
Instead of cramming every last detail into this Easter Island itinerary, we’ve broken out the foundational knowledge into a few other articles that we highly encourage you to read as a companion to this one.
Through the Easter Island travel guide, how to get to Easter Island, and Easter Island Packing List (coming soon), you’ll be able to get answer the questions such as:
- Where is Easter Island?
- What are the rules for visiting Easter Island?
- How does Rapa Nui National Park work?
- How many days do you need on the island?
- How to get to Easter Island?
- How much does it cost?
- Is it safe?
- Where should you eat?
Should You Rent A Car On Easter Island?

The topic of how car rentals on Easter Island work is another one that we’ve covered extensively.
We’ve broken this out into a separate guide because the answer is a bit more complicated. Pre-COVID, the answer for most independent travellers was “yes!” but with the current rules, it’s not so clear cut.
Find out the reasons for or against renting a car on the island, the different companies you can book with, expected costs, and more!
9 Day Easter Island Itinerary
These 9 days on Easter Island are incredibly special and if you get a chance to do something similar to this, you’ll come away with memories that will last you a lifetime.
Day 1: Arrival on Easter Island
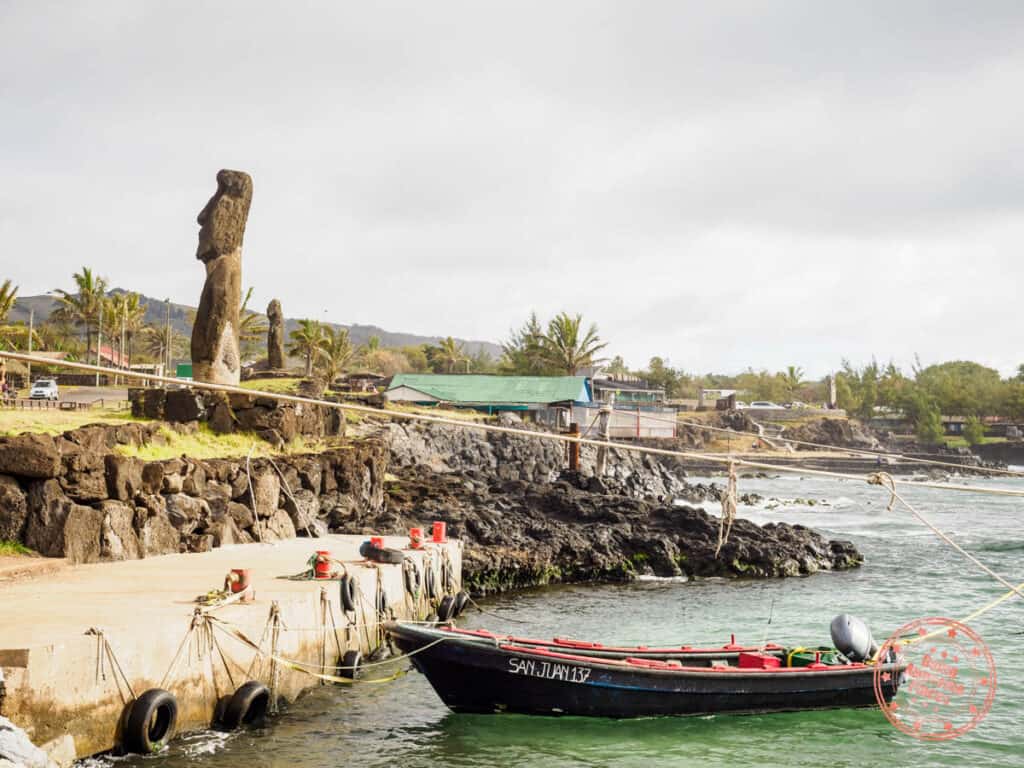
Your first day on Easter Island is a smooth way to change gears from what you might’ve gotten used to on the mainland. Slip on your flip flops, proudly don your lei, and watch one heck of a sunset.
With only one way to get to Easter Island and a maximum of 1 flight a day, you’ll land early afternoon with LATAM on flight LA841.

TIP: After you exit the plane and down the stairs, head over to the giant “IORANA” sign which is Rapanui for “Hello” and “Goodbye”. You can take your time here as it’ll take awhile for the bags to get unloaded and the ground crew aren’t in a hurry to shoo you away.
For those that have a hotel booking that include airport transfers, someone will be waiting for you. Otherwise, make sure to book a private transfer.
After you get checked in, the rest of the afternoon and evening are free for you to explore the capital of Hanga Roa.
You’ll notice right away that there are moai everywhere, even in town! It’s a surreal feeling to be in their presence and its something that never goes away.
The Hanga Roa Harbor is a fantastic place to get oriented as its one of the fixtures of town. You can grab ice cream and watch the sea turtles sway back and forth with the ebb and flow of the waves.
A few other things we recommend that you take care of are:
- Visit the dive shop if you plan on scuba diving.
- Sort out your water situation and whether you need to buy any jugs or bottles.
- Purchase your Rapa Nui National Park tickets at the office if you don’t want to buy them online. Make sure to go before they close at 5PM (it’s best to arrive before 4:30PM).

For dinner, a restaurant that has a fitting laid back vibe is Oheho Surf Cafe. Here, you’ll find generous portions of classic Chilean and local Easter Island dishes. The Pescado a lo Pobre is a winner with its juicy tuna steak, caramelized onions, and over easy egg, all over a bed of fries!

On your way back to your hotel (we recommend Takarua Lodge for this reason), join the congregation of other travellers at Tahai by finding a comfy spot on the grass. What a way to kick off what will end up being a magical trip.
Day 1 Summary
What you’ll do:
- Sea turtle spotting at Hanga Roa Harbor
- Tahai sunset (Ahu Vai Uri, Ahu Tahai and Ahu Ko Te Riku)
Where you’ll eat:
- Dinner – Oheho Surf Cafe – Casual surf shack vibes with a selection of Chilean and local dishes.
Where you’ll stay:
Tips:
- Re-confirm with your guide: It’s a good idea to connect with your guide to re-confirm the pick up time. If you haven’t already, make sure you communicate through WhatsApp as this is the preferred method of communication on Easter Island and all of Chile.
- Breakfast time: If you’re stay at Takarua Lodge, let reception know what time you’d like them to deliver your food.
- Make reservations at Te Moai Sunset: Want a good spot at this restaurant on the second floor? Book a table here and ask for a table up there.
Day 2: Moai Monuments Tour

There is so much to see and learn on Easter Island. You’ll waste no time on this second day of the itinerary with a comprehensive tour of the most important moai on the island.
Almost all tour companies offer a similar type of tour and in Green Island Tours‘ case, it’s called the Moai Monuments Tour.
Excellent Experience with Green Island Tours
It’s impossible to try every tour company but we can fully attest to the quality of tours by Green Island Tours. We spent a total of 3 days with them including Moai Monuments Tour, Historic Pathways Tour, Stargazing Experience, and North Coast Adventurer. Marc and Ludo were awesome guides.
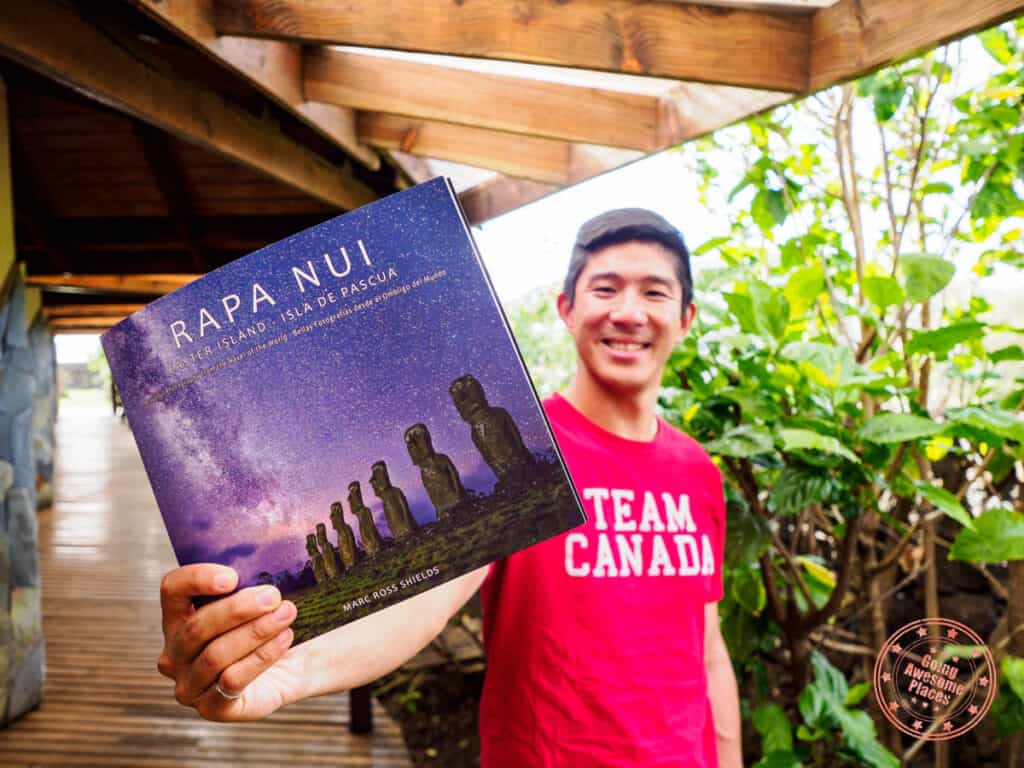
Special offer – Use “Going Awesome Places” under “discount code” and receive Marc’s photography book for free (sold for $35,000 CLP at the airport).
Your day kicks off ironically right next door to Takarua Lodge. You’ll walk across the parking lot to Tahai which is a significant archeological site. Here, you’ll see a number of moai atop of their ceremonial platforms, well-preserved examples of the rock foundation used to build the houses shaped like boats, stone chicken houses, burial site for William Mulloy, and a fallen moai as well.
As the starting point to the tour, you’ll start learning the story of Rapa Nui (indigenous name for Easter Island) and this will carry through the entire tour.
TIP: If you still haven’t purchased your Rapa Nui National Park tickets at this point, there’s still time to drop by the office as you don’t need one for Tahai.

Passing through town, your guide will suggest somewhere to pick up some food for lunch. If they don’t, ask about dropping by Panaderia y Pasteleria Hitu, a local bakery known for their empanadas.

Cutting across the island, your next stop is Akahanga. This is one of the largest complexes on the island with 3 different ahu (ceremonial platforms) that have been left unrestored. There’s something impactful about seeing the moai in this state, allowing you to learn about what eventually happened to the islanders that lived here.
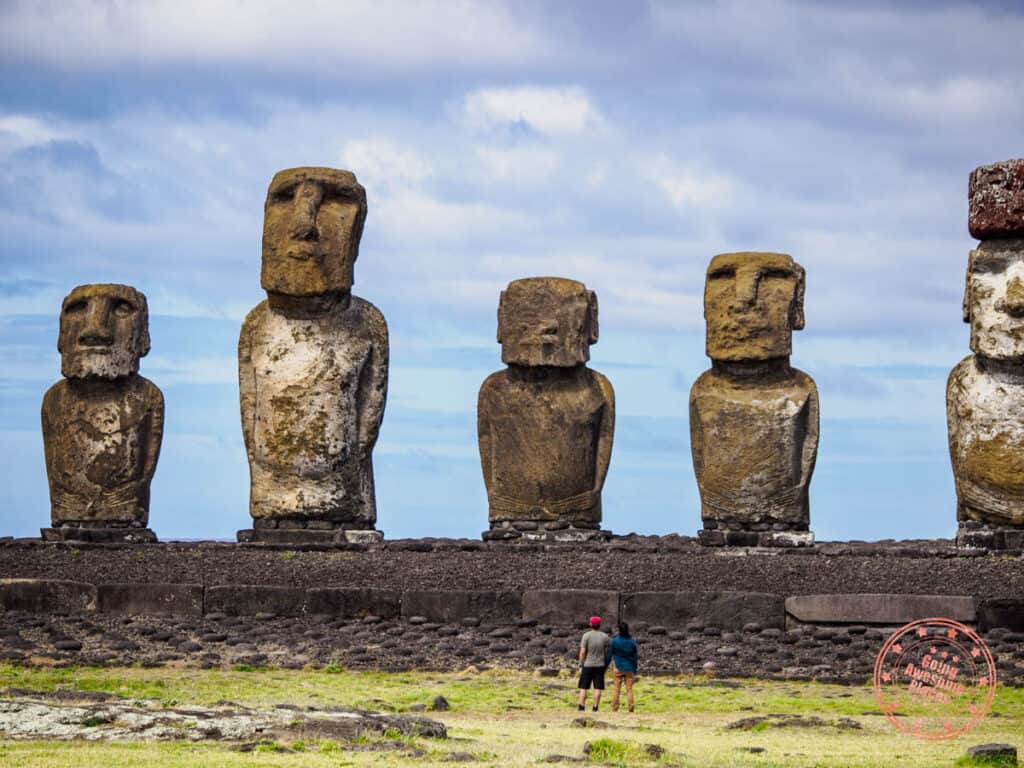
The ahu and moai just get bigger and grander. At Ahu Tongariki, you’ll be walking amongst giants with 15 colossal moai that exemplify the pinnacle of their craftsmanship and extravagance.
In addition, you’ll also see a broken moai that was never completed and well-preserved petroglyphs.
Much of what you thought you knew about Easter Island and the history that you’ve been learning on the trip so far collide when you finally get to Rano Raraku, the volcanic quarry where moai were birthed. It’s here that you come face to face with those stone heads that you’ve seen pictures of and realize that it’s really just the tip of the iceberg.
Rano Raraku remains one of the greatest and most curious creations of mankind, a monument to the great lost unknown behind us…
Thor Heyerdahl

When you arrive, you’ll get to have lunch that you picked up earlier or you can buy refreshments at the café here. Bathrooms are also located on-site.
In this enormous quarry situated on the crater slope are hundreds of moai left in various stages of carving. They’re tilted at all angles, revealing only their heads and parts of their torso. Looking at the rock itself, you’ll also find partially cut moai lying down. Each one was waiting to be transported to ahu all over the island and suddenly, everything stopped.
Next on the tour is Te Pito Kura where you’ll find the largest moai that ever stood on an ahu, standing at 10 meters tall. Next to this is a peculiar well-like wall, where you’ll find 4 smaller stones surrounding one larger perfectly circular stone.
Your guide will tell you more about Rapa Nui’s first king, Hotu Matu’a, the ancient homeland of Hiva, and why it’s referred to as ‘The Navel of the World’.
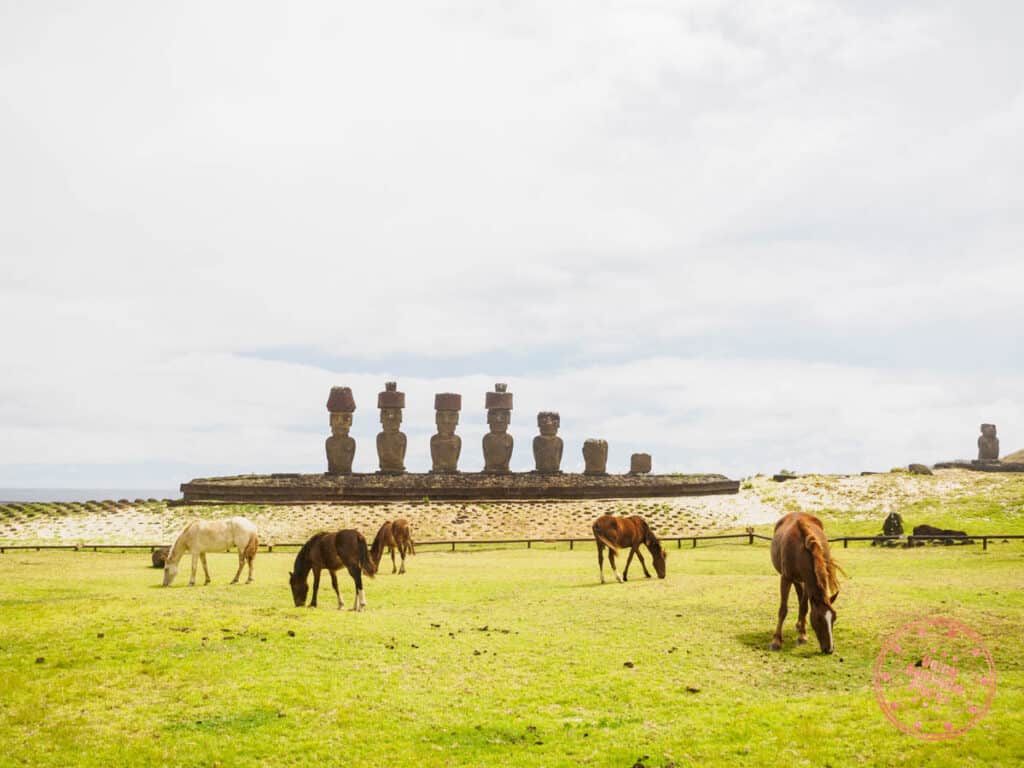
Closing out your day is a visit to the famed beach of Anakena and the two platforms, Ahu Nau Nau and Ahu Ature Huki. You’ll be invited to see the moai up-close from all angles and also from afar, giving you more appreciation of the fine details and macro view of why these stone statues were built.
Ask to get dropped off at your dinner restaurant of choice. We recommend that you try Makona Restaurant. They’re located right along the main street of Atamu Tekena. We suggest that you have their Chef’s Ceviche and Octopus PilPil. As a bonus, their menu has English!
Walking back to your hotel, you can always enjoy another sunset at Tahai, or get some early rest.
Day 2 Summary
What you’ll see:
Where you’ll eat:
- Breakfast – Takarua Lodge
- Lunch – Panaderia y Pasteleria Hitu – Empanadas to go.
- Dinner – Makona Restaurant – Well-reviewed restaurant with an expansive menu that includes seafood, meats, pasta, and salad.
Where you’ll stay:
Day 3: Museum and Coastal Walk
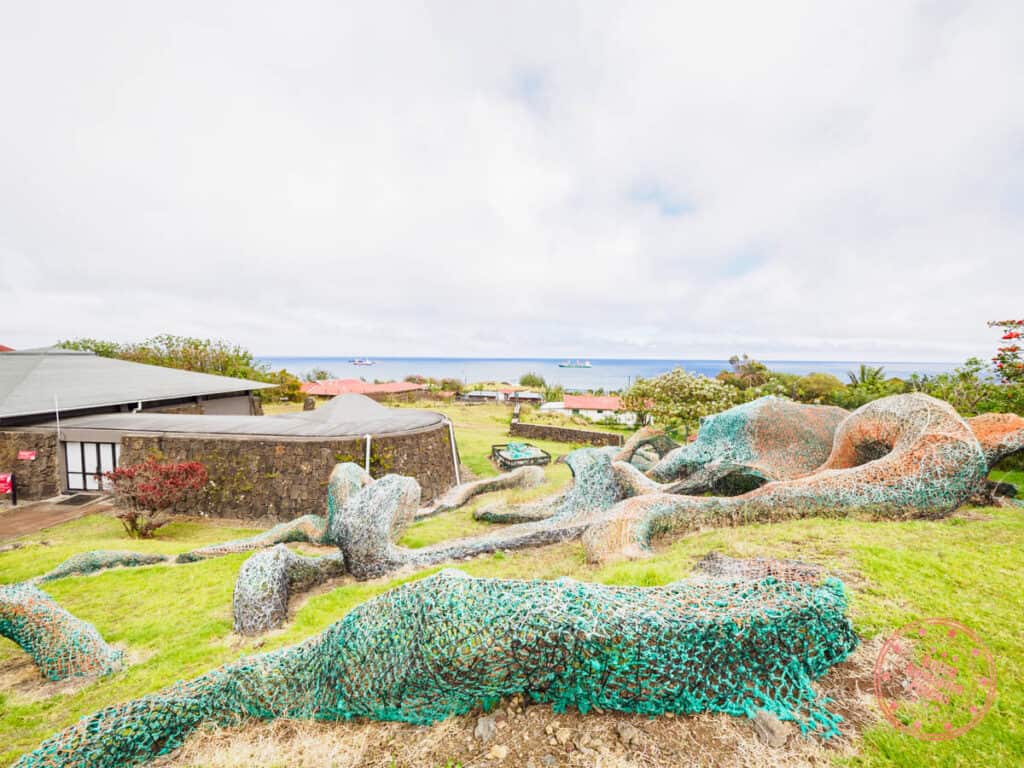
For your third day of this Easter Island itinerary, you’ll get to dive deeper into the history of Rapa Nui and you’ll also get to walk the coast around Hanga Roa towards a cave with a name that translates to Cannibal Cave.
After a jam-packed day, see all of the famous moai sites, you’ll appreciate having a slow day to recover while also reinforcing a lot of what you’ve learned so far.
The truth is, we didn’t intend for this to be an off day but mother nature had other plans for us. With the forecast showing heavy rain, Green Island Tours moved our Historic Pathways Tour to Day 4. This goes to prove that it helps to have more days to work with. If we didn’t have any flexibility, we would have had to go according to our original plan and tour in the rain. With 9 days, we simply swapped it out and turned this into a free day.
After a hearty breakfast at your hotel, head out to the nearby Sebastian Englert Anthropological Museum which some simply call the Rapa Nui Museum. This is a great place to visit on a rainy or free day. It’s free and offers a wealth of information about the history of Easter Island in their permanent and temporary exhibits.
While you’re here, pay attention to the exclusive artifacts that they have – an authentic white coral eye, one of the few female moai, Rongo Rongo Tablets, and carving tools.
WHAT YOU NEED TO KNOW
Hours: The official hours are posted on this page. They are closed on Monday.
- Tuesday to Friday : 9:30AM to 5:30PM
- Saturday, Sunday and holidays : 9:30AM to 12:30PM
Price: Free
Tips:
- If you enjoyed the displays in the museum and are interested in going deeper, they have a book version of them called ‘Los Ancestros de Rapa Nui’ for $10,000 CLP.
- They offer guided tours of the permanent exhibit for groups of 5-15. Reservations are made via phone or e-mail. This is likely Spanish-only.
- If you’d like to visit the library, they are open Monday to Friday 9:30AM – 1PM and 2PM – 5:30PM.
On your way into town, Dulce Mar is a great little lunch spot with a focus on fresh fruit juices, smoothies, and plenty of healthy options to keep your energy up for the rest of the day.

For the afternoon, a great idea is to take a leisurely walk from the Hanga Roa Harbor and follow the coastline south. Right by the harbor, there’s already several moai but keep walking and you’ll encounter more remnants of Rapa Nui culture.
TIP: If you’re planning to go diving on Day 6, make sure to drop by the dive shop to let them know that you’re interested and to find out whether trips are running that day. If there are slots available, you can secure one by putting down a deposit. You can also get a head start with some of the paperwork as well.
Along the way, you’ll encounter local hang out spots such as the Pea swimming pool and beach which leads out to the waters that are frequented by surfers.
TIP: If you need to go to the ATM, you’ll be walking past Santander and you won’t be far from BancoEstado.
As you continue along the coastline, the calming crashing of waves, the Pacific breeze, and shimmering sun are a constant. Soak in the views and you’ll remark how quiet it is on Easter Island.
Eventually, you’ll see the closest thing Easter Island has to a port in Hango Piko. At only 4 meters deep, large cargo ships can’t make here so it’s usually buzzing with activity, whether its fishermen heading out or flat bottomed boats ferrying cargo.


While you’re here, don’t miss a significant-sized platform, Ahu Riata, that was restored in 1988. There’s also an outrigger canoe club here.
The walk drags out a bit as you make your way up hill and eventually flattens out to crossing the edge of the airport. Continue along the road.
Eventually, you’ll come upon Ana Kai Tangata. There usually aren’t many visitors in the afternoon so you’ll have the area all to yourself.
A HEADS UP: The next day’s Historic Pathways Tour starts with Ana Kai Tangata.
Pass the main sign and follow the path to the right until it opens up to the sight of powerful waves rushing into a narrow bay. Follow the stairs down and you’ll be welcomed by a large cave.
Ana means cave, Kai means to eat, and Tangata translates to man which mis-translates to it’s alternate name, Cannibal Cave. In this connotation, Kai is meant to mean gathering.
Look up once you’re inside the cave. While faded, these are remarkable examples of rock wall paintings of birds, representing the manutara (Sooty Terns) from the Birdman cult.
As you pop up from the cave, walk along the coastline and admire the view of the rising crater of Rano Kau which you’ll be visiting the next day. There’s also another cave that you’ll be able to see from the cliff vantage point but you won’t be able to visit this one.
WHAT YOU NEED TO KNOW
Managed: No, and guide not required.
National Park ticket required?: No
Best time to come: Anytime
Tips:
- Not actively promoted by Rapa Nui National Park but the site isn’t closed off.
- The tide isn’t as big of a concern compared to instability of the cave ceiling. Part of the ceiling collapsed not too long ago. Be alert while you’re there and don’t linger too long.
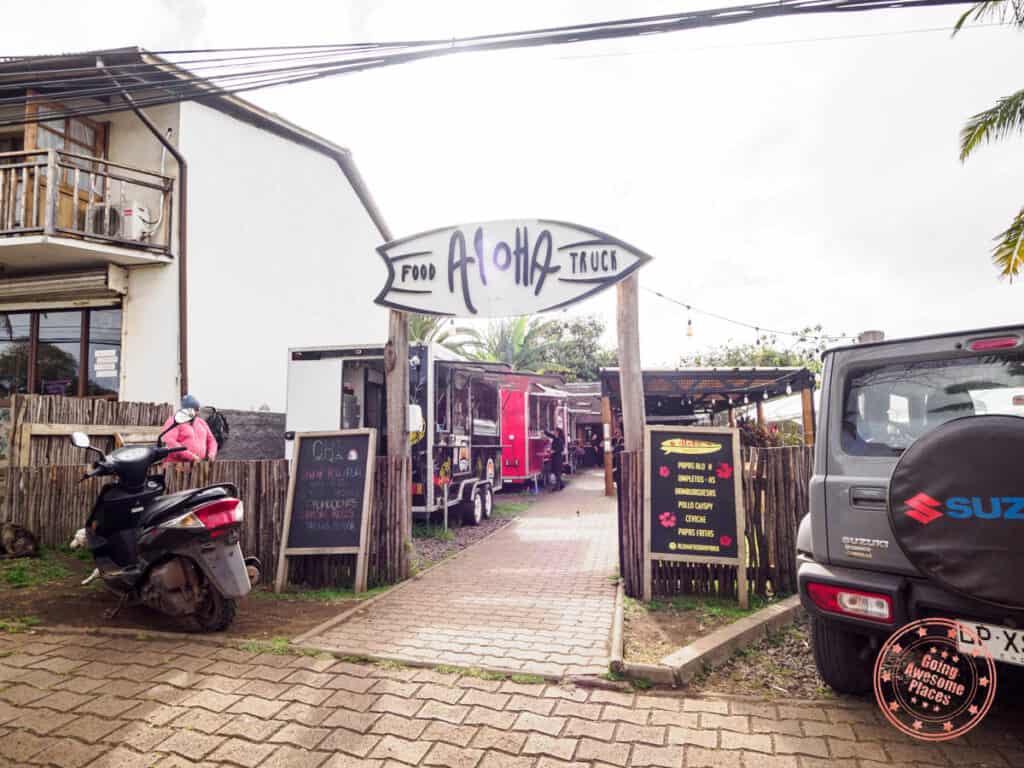
Walk back into the center of town and pick a restaurant you’d like try. We ended up in the Aloha Food Trucks area on the main street, grabbing a drink from the bar at the back and having sushi from Ohi Sushi.
It was a nice experience to eat outside surrounded by the action of food trucks but admittedly, the sushi left much to be desired.
You’ve done a lot of walking at this point so you can call one of the cabs to take you back to Takarua Lodge. From Aloha Food Trucks, this should cost $5,000 CLP.
If you’re interested, you can walk over to Tahai to photograph the sunset or do a little astrophotography.
Day 3 Summary
What you’ll see:
- Sebastian Englert Anthropological Museum (Rapa Nui Museum)
- Pea Beach and Swimming Pool
- Hanga Piko Port
- Ahu Riata
- Ana Kai Tangata
- Tahai
Where you’ll eat:
- Breakfast – Takarua Lodge
- Lunch – Dulce Mar
- Dinner – Ohi Sushi at Aloha Food Trucks – Sushi food truck that’s is an area with plenty of open-air seating. You can order drinks from Ira Bar at the back.
Where you’ll stay:
Tips:
- Museum closed on Monday – If this day lands on a Monday, remember that you won’t be able to go to the Rapa Nui Museum.
- Preparing for scuba diving – A reminder to schedule some time to visit the dive shops in Hanga Roa Harbor so you can pick which one you want to go with, secure a spot with a deposit, and get the paperwork started. Remember to bring your scuba license card.
Everything You Need To Know About Travel to Easter Island
No detail is spared. This is the must-read Easter Island travel guide. Thank us later 😉
Visiting Easter Island Guide
Day 4: Historic Pathways Tour
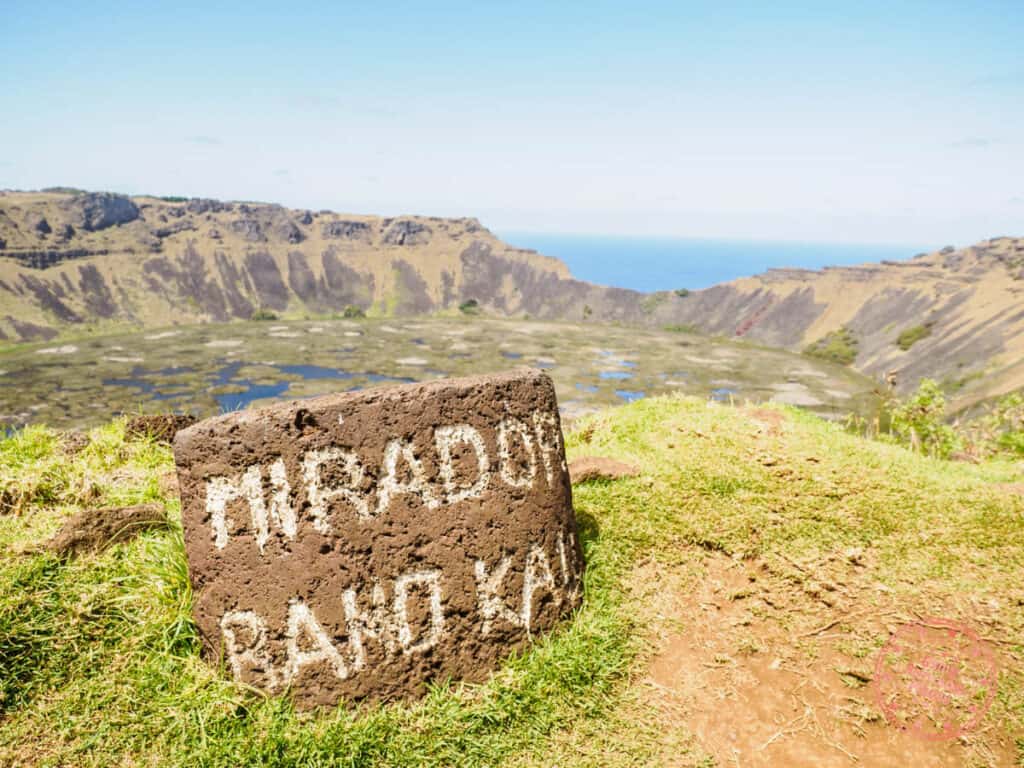
This is the classic second full day tour to complement the Moai Monuments Tour with Green Island Tours where you’ll go deeper into the culture, history, and even geographically with a tour called Historic Pathways Tour.
Similar to Day 2, after breakfast at your hotel, you’ll get picked up by the Green Island Tours guide.
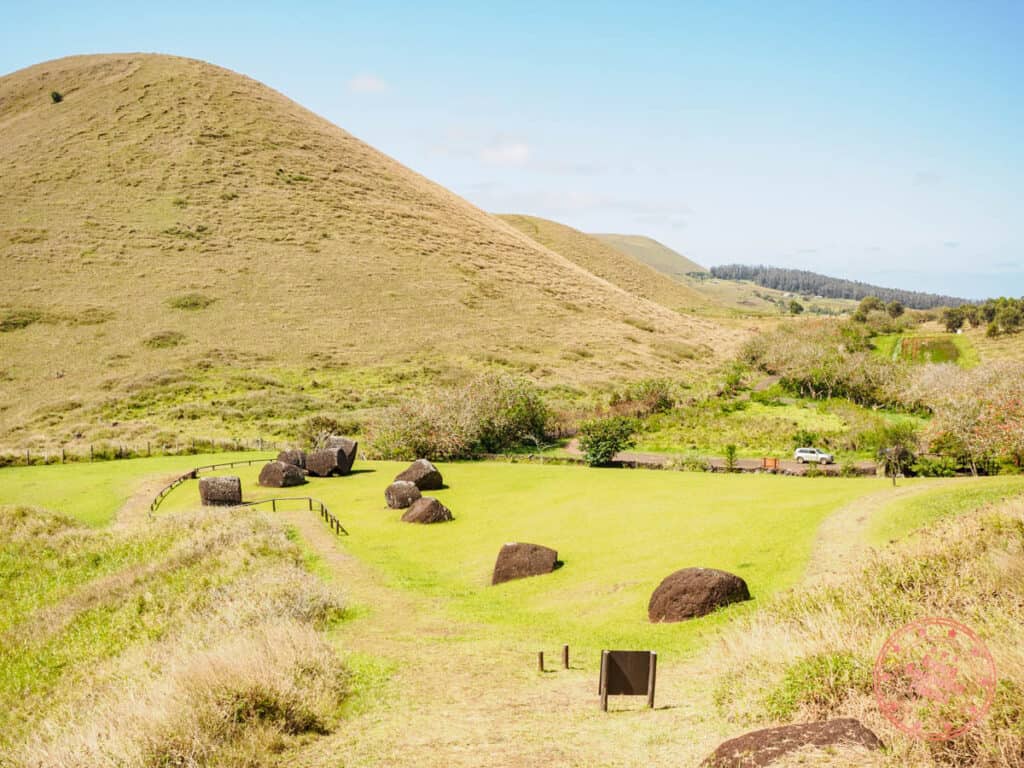
Your first stop is the lesser-known quarry on Easter Island called Puna Pau. This is where the Rapanui found the red scoria stone to carve out the topknots.
When you get here, you’ll get an appreciation for how challenging it must’ve been to cut out cylinders of the red stone, push it up the hill, then roll it back down. It’s a much smaller crater than the other ones around the island but you’ll get an added appreciation for all the work required to make the moai come to life.
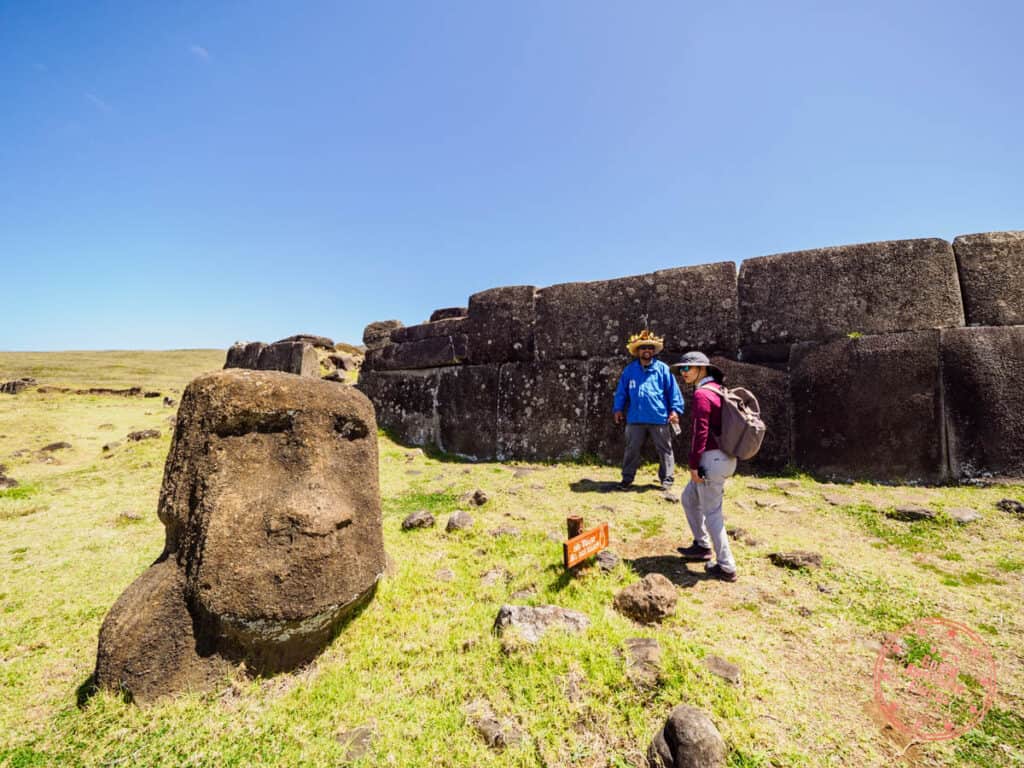
A short drive away is Vinapu, located on the southern coast by the airport. Here is Ahu Tahira which might look like the other platforms but walk to the back wall and you’ll see the stone is cut with laser-like precision.
The mystery you’ll learn about is how this is very similar the stonework found in Cusco, Peru by the Incans. The question is whether there was any influence from one to the other or was it merely a natural evolution in the craft.
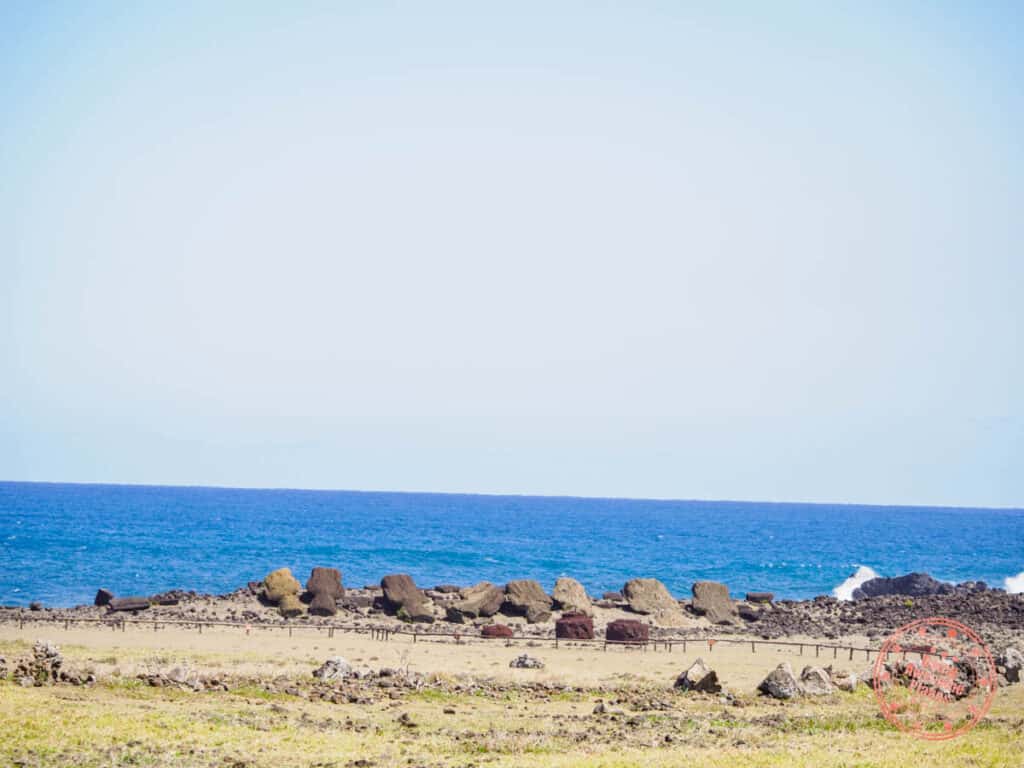
Vaihu is a unique stop as they’ve actually recreated a traditional Rapanui village here. Instead of just the bases of boat houses you’ve seen all over the island, you’ll get to see what they might’ve looked like.
It’s here that you’ll also see Ahu Hanga Te’e, where you’ll find 8 fallen moai, all broken at the neck, and their red topknots not far away.
Next is Ana Kai Tangata, somewhere you might be familiar with from Day 3 of the Easter Island itinerary.
Even if you visited, there isn’t a lot of overlap as your guide’s main purpose of coming here is to share with you new stories and delve into Rapa Nui’s oral history and song.
There’ll also be a focus on the transition to the cult of the Birdman and theories of whether it existed simultaneously with the moai or was a complete break in the original traditions.

The above is very important because you’ll head up to the important village of Orongo, perched on the upper rim of the volcanic crater, Rano Kau.
Taking a break from moai, you’ll get to explore the ceremonial village with their cascading stone buildings that have direct view of the islets (called motu) on one side, and the inside of the crater on the other.
Your guide will explain how the annual Birdman Competition worked, the result of a new religious system to create order after the moai were toppled.
TIP: If you want a closer look at the motu (islets) from up here, bring your binoculars.
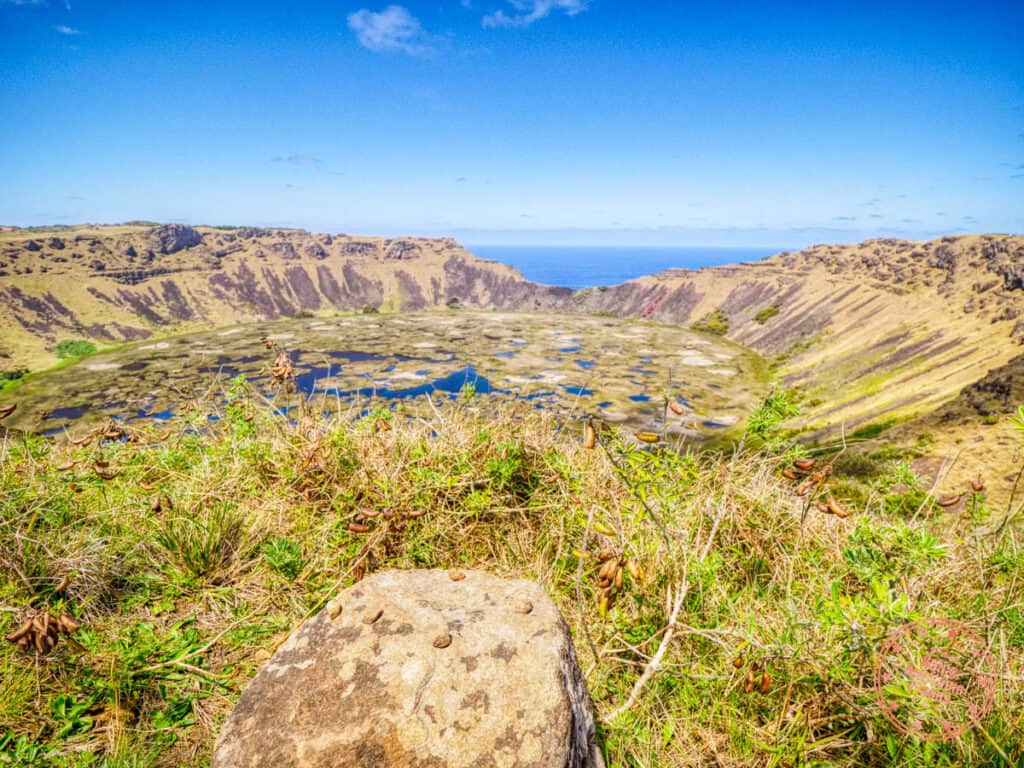
On your way down from the crater, you’ll get to see more jaw-dropping views of the crater. Small details matter here as your guide will point out the small holes in the rock. Filling them with small pebbles, you’ll see that it actually represents the 5 main stars of the Pleiades constellation.
For lunch, you’ll have an opportunity to pass through Hanga Roa or if you’d like to maximize on your time, eat something along the drive.
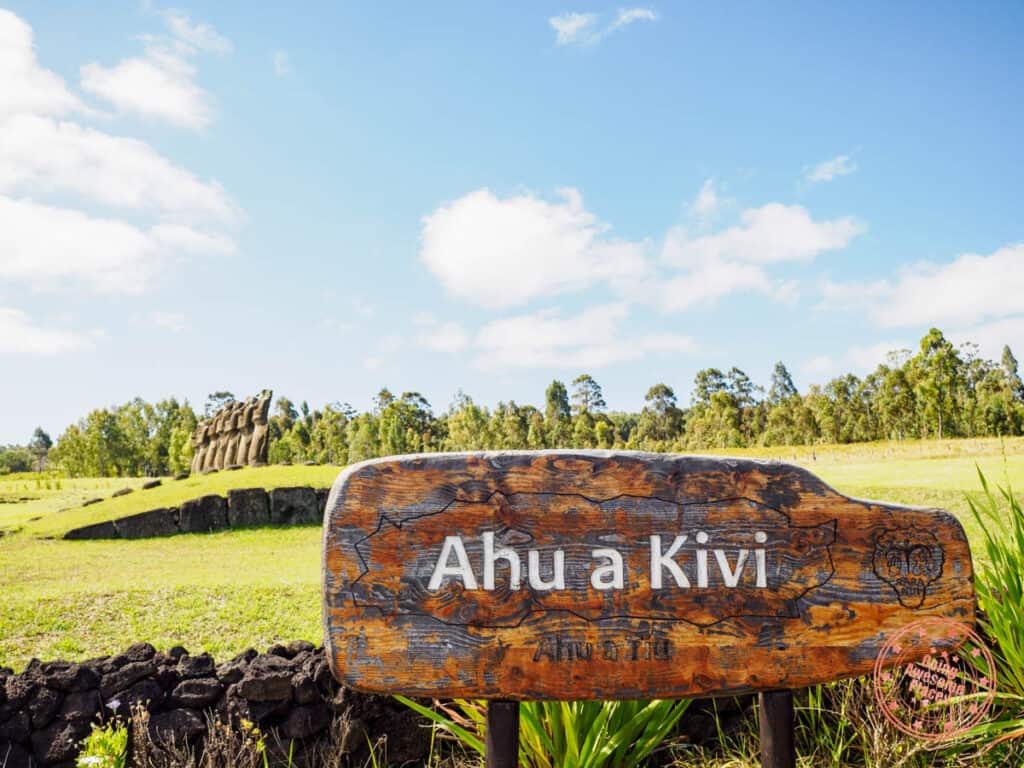
Your next stop is the restored site of Ahu Akivi. So far, all of the ceremonial platforms with moai have been near the water but that was certainly not the rule. Here, you’ll see 7 moai stoically overlooking a village which is now quite overgrown and in ruins.
There isn’t too much walking you’ll do here as the site is right next to the dirt lot. It’s usually pretty quiet here, so you’ll have plenty of time and space for photos. In terms of larger moai sites, this one is the most laid back.
The last spot you’ll be visiting is the cave tunnel system called Ana Te Pahu, a site that’s quite close to Ahu Akivi.
From the guard tower, you’ll walk along the dirt path that’s also shared by local farmers. Along the way, you’ll see remnants of the base of ancient boat houses. Arriving at Ana Te Pahu, you’ll first be teased by openings in the ground with full-sized trees sprouting through but there’s more to them.
Ana Te Pahu is in fact the best examples of volcanic tubes that were created thousands of years ago when Easter Island was created.
Your guide will lead you down a path that takes you into a tunnel system created by lava tubes. In some areas, the cave ceiling completely collapsed, allowing seed, sunlight, and water to come through, creating an oasis grove of banana trees.
This cave system was used as a refuge, burial chamber, and hiding place. Inside, there are several clues for this including old stone ovens called umu pae, stone barriers, and natural nursery for crops.
TIP: Make sure you have good footwear. You won’t be traversing through all 7km of interconnected chambers but you’ll definitely be climbing over and and around many rocks.
At the end of the tour, ask your to drop you off in town.

Have a quick dinner at Poco Poco in Hanga Roa and add another remarkable sunset in the books.
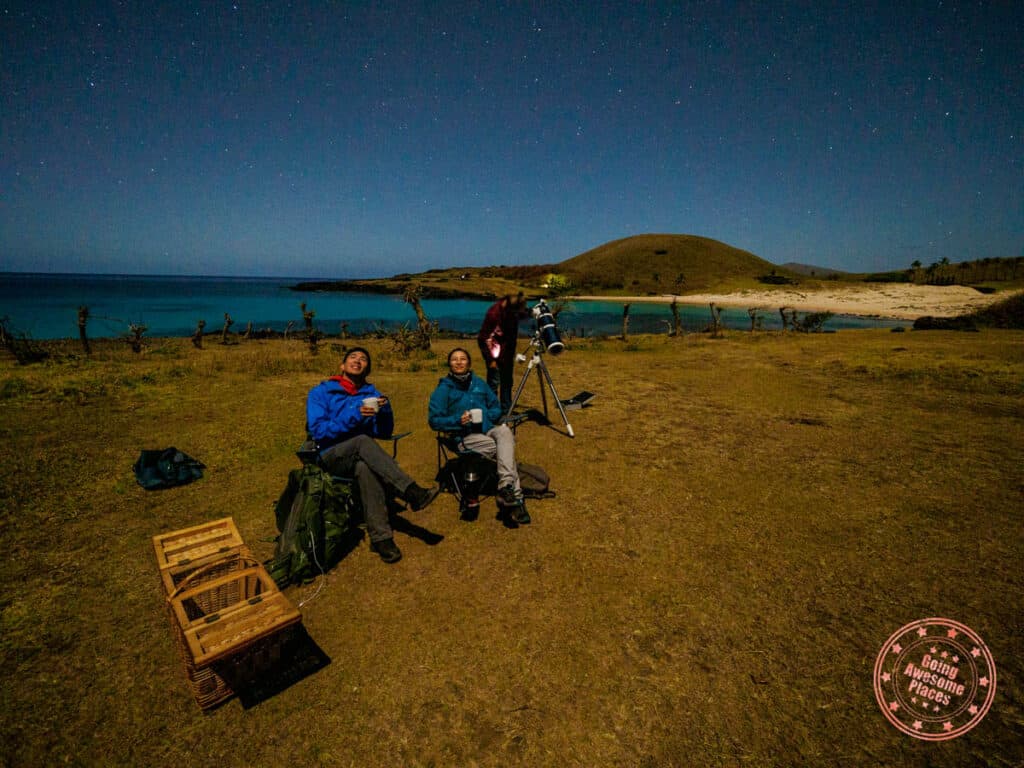
Blanketed by a cover of stars, you’ll head out with your stargazing guide. Arriving to a quiet part of Anakena, Green Island Tours sets up camping chairs and a high-powered telescope at the site alongside a spread of snacks and hot chocolate.
With the help of slides on a laptop, you’ll learn the principles of astronomy, the same ones used by Polynesians that navigated with the stars.
Armed with better knowledge of the stars, you’ll get up close to star clusters, nebulae, and planets with the help of the telescope that your guide will get pointed to the right direction.
To close things off, you’ll be able to walk right up to Ahu Nau Nau and do a little astrophotography with your phone or camera.
WHAT YOU NEED TO KNOW
Where: The location is dependent on weather but Green Island Tours usually does this near Anakena Beach (specific location marked on the map)
Time: The start time will largely depend on the sunset time but it usually starts at 8:45PM and lasts 3 hours. In the winter, it could start as early as 7:30PM.
Tips:
- Temperatures dip in the evening so make sure you come prepared with your jacket and warm mid-layers.
- Prepare to be flexible with your stargazing day. You should start attempting to do stargazing as early as the first day of your trip as you never know when the perfect day will be.
- Ideal days for stargazing are when the skies are clear and you’re as far away as you can be to a full moon.
- This is a relatively inexpensive tour when compared to the other tours on the island and is worth adding to your trip.
Day 4 Summary
What you’ll see:
Where you’ll eat:
- Breakfast – Takarua Lodge
- Lunch – To save money, bring your own lunch on this day or you can ask to drop by Panaderia y Pasteleria Hitu.
- Dinner – Poco Poco – Patio dining with excellent view of the sunset serving a mix of seafood (when they have it available) and traditional Chilean dishes.
Where you’ll stay:
Tips:
- Remember to let your lodge know that you’ll want a later breakfast tomorrow.
Day 5: Incredible Crater Hike and Kari Kari

The luxury of 9 days on Easter Island means that you can spread things out a little and have a more relaxed day after a busy one.
With 2 of the major tour days over, there’s no an opportunity to rent a car and explore the island on your own. While there are a lot of limitations on where you can go, if you know where to go, there’s quite a bit to see.
After a later breakfast than usual, head out on foot to explore different parts of town that you haven’t been able to so far whether it’s the Hanga Roa Cemetery, Feria Artesanal, and CorresoChile (if you need stamps for postcards).

There are several ways to rent a car on Easter Island. The easiest ones to get to in town are Oceanic, Insular, and Mahinatur. Their rates will vary but you should be able to negotiate them down if you know what each one is offering. Remember, you shouldn’t feel the need to reserve anything ahead of time as there’s plenty of supply.
With your new wheels and new-found freedom, it’s time to hit the road! First stop, grab a lunch to go at a new joint you want to try out or just go back to the go-to Panaderia y Pasteleria Hitu.
Head down to the southern coast and head to an area called Tarakiu Poukara (not marked on Google Maps but is pinned on our map). This is where there are a scattering of several smaller ahu and is accessible by going off-road from the main road.
To the left, you’ll also see a small boat ramp and pier used by fishermen. This is a good spot to find a spot to sit and have your toasty empanadas.
From here, follow the coastal road back to where you came, except this time, you’ll drive to the southern tip of the runway. This is quite the pretty drive, with the powerful Pacific Ocean splashing all along the way.
Passing by the large fuel tanks, make a right and eventually left to start making your way up to Rano Kau crater. Continue driving until you see closed gates on the left hand side with the sun-weathered sign that says “Via a Tare”. Park here to start your hike.

The Via a Tare hike is a bit of a hidden one because the gate makes it look like you’re not allowed to go further but it’s simply meant to prevent cars from further eroding the path in a delicate part of the island.
The hike largely follows the dirt road that climbs and for the most part is quite uneventful. There is a small detour to an archaeological site with a sign that says “Maea Hono Hotu Matua” and you’ll find a ring of stones surrounding another rock of significance.
You’ll eventually hit the tree line and this is when the path becomes a little unclear and where it helps to use an app like Gaia GPS or AllTrails. You’ll want to start angling towards the crater’s edge at this point. There’s no right or wrong path you can take but follow the somewhat travelled paths created from previous hikers. Eventually you’ll come out of the trees and you’ll see the crater.
You can continue along the path to towards the ocean but you certainly don’t need to go that far. The view from the entire edge of the crater is quite extraordinary.
WHAT YOU NEED TO KNOW


Trail map: This is a tracked hike from our trip. We stopped it a tad early but it covers the route that we took.
Managed: No, and guide not required.
National Park ticket required?: No
Best time to come: Anytime
Where: The specific start of the hike can’t be found on Google Maps which is why we’ve pinned it on our own map.
Time: At a modest pace and with time to take photos, it’ll take roughly 2 hours.
Tips:
- The Via a Tare sign looks almost like a warning sign but anyone is allowed to hike here.
- Be careful of the cliff edges along the crater.
- You certainly don’t want to be doing this hike in the dark so plan your hike accordingly.
- The sun beats down on you quite heavily throughout this hike as there’s no cover aside from the trees that you cut through.
- If you’d rather do a guided tour, Green Island Tours also offers a Via A Tare Crater Walk tour.

You’ll no doubt be hungry after the hike. For dinner, you’ll be eating at one of the more well-known restaurants in town, Te Moana. They have superb views of the ocean being right along its edge, and they have a great selection of fresh fish and ceviche as well.

A visit to Easter Island wouldn’t be complete without going to a traditional Rapa Nui dance show. The most popular one on the island is called Kari Kari.
For an hour, you’ll be treated to an authentic showcase of Rapanui dance and music. In addition to the impressive hip-swaying, and elegant moves, you’ll be impressed by their intricate regalia, passion, and how well they incorporate audience interaction.
Our tips on seeing a Rapa Nui dance performance can be found in our article on the things to do on Easter Island.
Day 5 Summary
What you’ll see:
- Hanga Roa Cemetery
- CorreosChile
- Feria Artesanal
- Tarakiu Poukura
- Kari Kari show
What you’ll do:
Where you’ll eat:
- Breakfast – Takarua Lodge
- Lunch – Empanadas to go at Panaderia y Pasteleria Hitu
- Dinner – Poco Poco – Patio dining with excellent view of the sunset serving a mix of seafood (when they have it available) and traditional Chilean dishes.
Where you’ll stay:
Tips:
Day 6: Water Filled Day

The water is calling for your sixth day on the island. You’ve been able to see all of the jewels on land but what about spending some time in the water? Off the coast of Easter Island is a mysterious moai wrapped in coral and there are also gold-sand beaches to take advantage of.
Your day will start quite early as dives typically start at 8:45AM. We recommend having a light breakfast before going. If your hotel has breakfast included, you can ask them to prepare a small take-away meal.
If you’re looking to go diving on Easter Island, the one you’ll want to start with is the sunken moai that’s not far from shore. We do have to burst your bubble though in saying that this moai isn’t authentic and was a prop for the film, Rapa Nui.
There are several companies lined up along the Hanga Roa Harbor but the one that we recommend is Mike Rapu Scuba Diving.
We cover the details of what to expect with Mike Rapu Scuba Diving in our guide to the top things to do on Easter Island but overall, we thought that they were a decent shop that’s probably one of the best on the island but would classify it as quite mediocre (service, professionalism, quality of gear, etc.) when we look at all of the ones we’ve gone with around the world.
TIP: It’s honestly a bit frustrating trying to communicate with any dive shop on Easter Island. WhatsApp is going to be your best bet but if there are any lingering questions, just make sure you visit a few days before, or on your first day of arrival to sort things out.
Taking the 3-row fishing boat out into the ocean, you’ll get to the dive site quite quickly. Taking a back roll into the water, the initial shock is the cool temperature of the water but you’ll get used to it quickly. As you descend, you’ll notice how clear the water is.
The dive starts with the viewing of the moai which is now covered in coral. Your guide will help with photos (they charge $5,000 CLP per person) and afterwards, you’ll spend the rest of the time exploring the hard coral that surrounds the area including its passages, walls, and changes in depth.
Overall, it’s not the most eventful dive aside from the moai so I’d do this one with tempered expectations.
Back on land, get your dive photos sorted by providing them with a USB key or SD card, fill out your dive log, and you can either shower at the shop or head back to your hotel which might be more pleasant.

For lunch, you can choose any restaurant in town. One that’s worth checking out is Maná Café which is right along the main street of Atamu Tekena and next to Makona Restaurant. It’s relatively new and has a selection of sandwiches, juices, coffee, pizza, cakes and classic Chilean dishes. We had our first Pastel de Choclo in here!

Before you head out of the capital, make your way to the tourist information office (Sernatur) for the special Rapa Nui stamp. This used to be in the CorreosChile post office but has now been moved here which makes more sense since you won’t have to deal with the long queues.
When you arrive, simply ask the staff for the stamp and they’ll take it out for you to use. It isn’t left out in the open.
The afternoon is a chance for you to enjoy the beaches of Easter Island – Anakena and Ovahe. You get to decide how much time you want to spend time at each or perhaps you just want to plant down at one and enjoy the sun.

Anakena Beach is the popular choice with a large soft-sand beach, plenty of room to space out, and Ahu Nau Nau just behind. The beach also has a souvenir market, café, and bathrooms.

Ovahe Beach is the local favourite because it has more of that off-the-beaten-path feel. It’s more raw because of the exposed volcanic rock behind you and the smaller bay but the sand is equally a soft and the view is stunning. It’s a bit less accessible than Anakena because it requires a short walk over volcanic rock and squeezing through a passage way to get to the beach on the other end.


All relaxed, take your car rental back into town and have dinner at Neptune’s Island. This was one of our favourite restaurants on Easter Island for its ambiance, hospitality, and quality of the food. Their fresh fish on the grill and seafood curry is scrumptious!
Day 6 Summary
What you’ll do:
- Sunken moai scuba dive with Mike Rapu
- Special passport stamp at Tourist Information Office
- Beach day at Anakena and/or Ovahe
Where you’ll eat:
- Breakfast – Takarua Lodge – Light breakfast before diving.
- Lunch – Maná Café – Casual restaurant in Hanga Roa that serves a mix of quick food and classic Chilean dishes.
- Dinner – Neptune’s Island – Fisherman themed restaurant that’s one of the top eateries on Easter Island.
Where you’ll stay:
Tips:
- Bring a USB key or SD card – If you’re doing the dive and paying for the photos, the only way they can transfer it to you is if you give them one or the other. Remember to bring one.
- Move to earlier day if planning on doing more diving – If you’re interested in doing more dives, consider moving this up so that you can figure out a schedule while also making sure your last dive is 24 hours before your flight out.
Day 7: Relaxed Exploration

Thanks to your rental car, you’ll be able to get out to a few of the unmanaged Rapa Nui National Park sites that you’ve missed so far. Overall, it’s a day to chill, take it slow, and enjoy an island pace of life.
A week into your Easter Island itinerary and probably even more weeks being on the road, you deserve a day to sleep in. Have a relaxing morning, eating breakfast at your leisure and then kick back on the lounge chairs that you have on your back deck if you’re staying at Takarua Lodge.
When you’re ready for lunch, head into town with your car rental. Next to the row of dive shops in Hanga Roa Harbor is a restaurant named, La Taverne du Pecheur. This spot is right up there in terms of top spots to eat on Easter Island. They have a wide selection of fresh fish, their ceviche is excellent, and you’ll be impressed with their presentation and plating.
If you’re sweet tooth is calling, stop by Mikafè for ice cream.
As another free day to explore, take advantage of having a car rental by revisiting and explore new archeological sites on the island.

You can first stop at Ahu One Makihi. This is a relatively small site but you can drive right up to it and is another excellent example of an ahu left in situ with moai including topknots fallen over.
Here’s another idea – even though you don’t have a guide with you, it doesn’t mean you can’t get close to some of the sites you visited on previous days. Nearby are Rano Kau and Tongariki. While you won’t be able to get inside, you can still see them from outside.
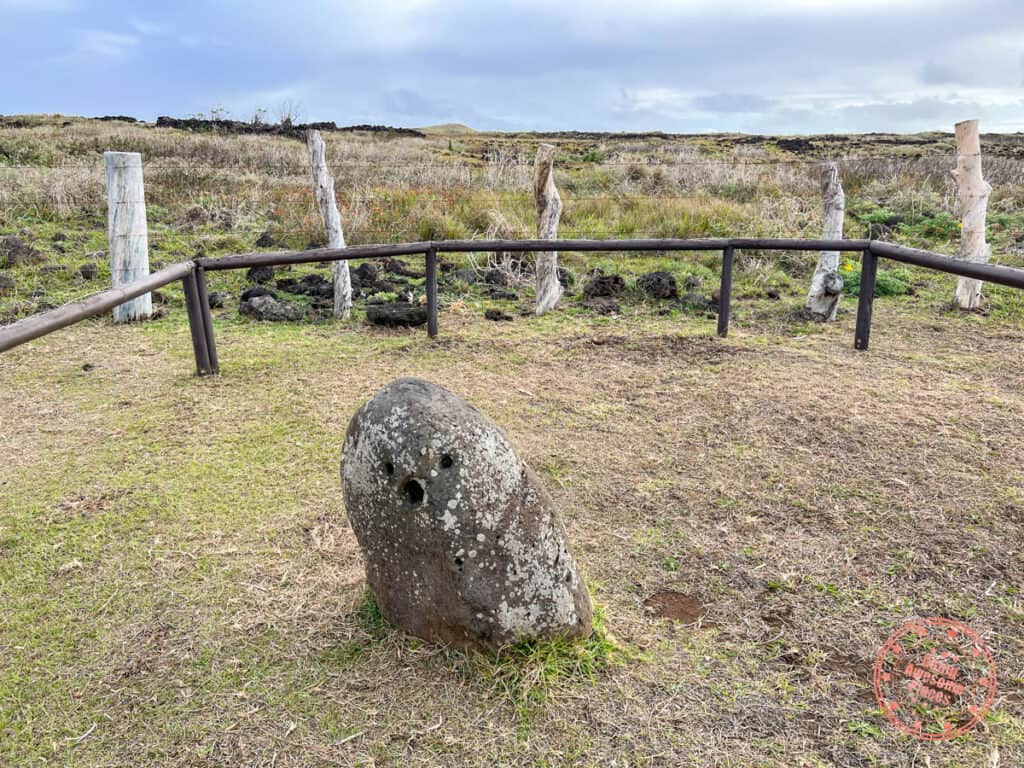
As you wrap around the island, you’ll first get to see the road-side rock named Pu’o Hiro. This is a small site has a unique rock that was blown into like a trumpet and said to attract fish to the land.
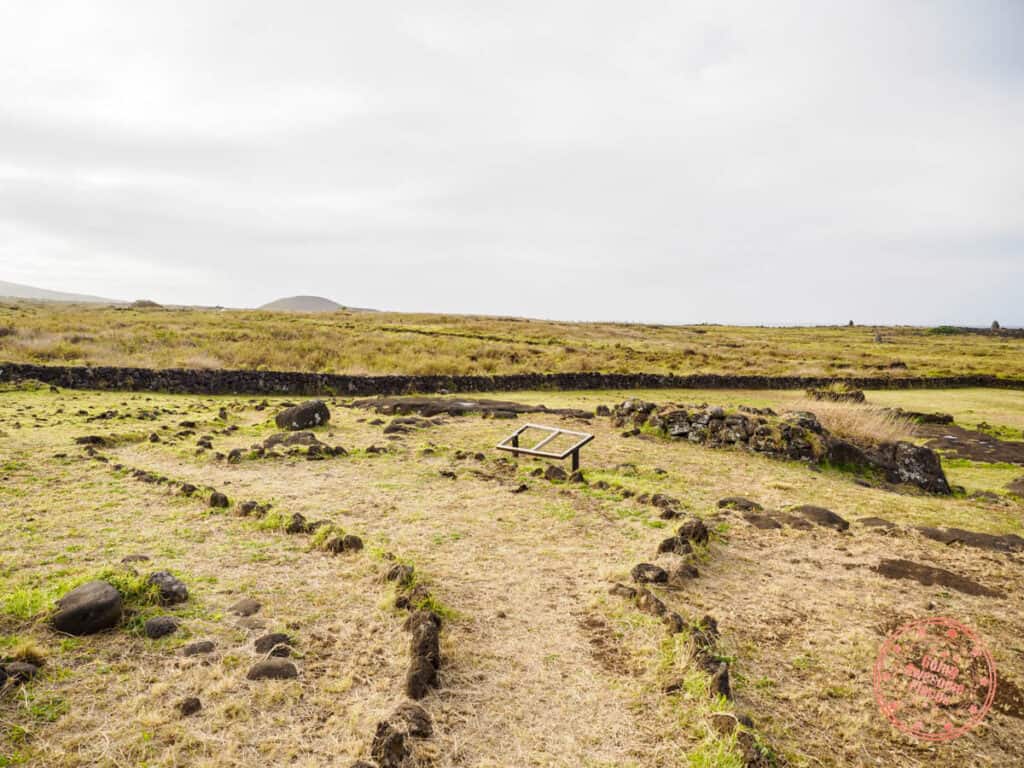
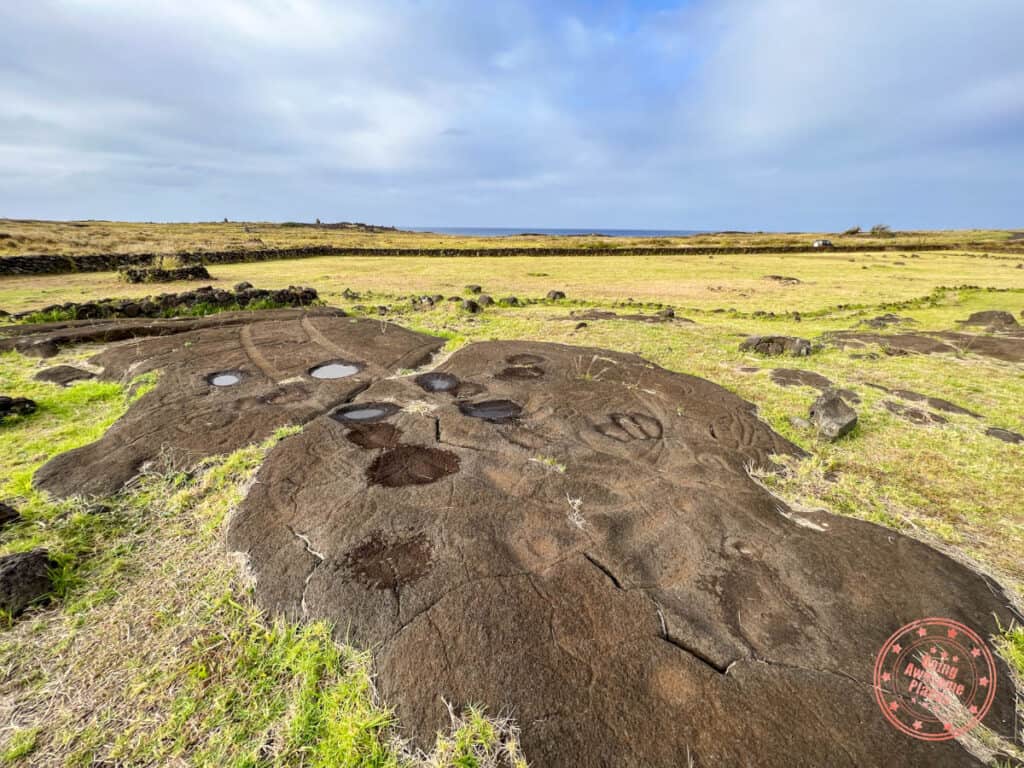
Another site you can visit without a guide is Papa Vaka. Park on the side of the road and simply walk through the unlocked turnstile to get in. There’s a significant spread of flattened lava stone that is covered with numerous marine-themed petroglyphs including turtles, octopus, tuna, and giant canoes.
The largest petroglyph on the island is located here with a canoe (vaka) that’s a remarkable 12 meters in length.

As you drive back into town, stop by Mercado Artesanal, the main craft market. This is the original building to find local crafts and souvenirs and has more options than the one in the center of town.
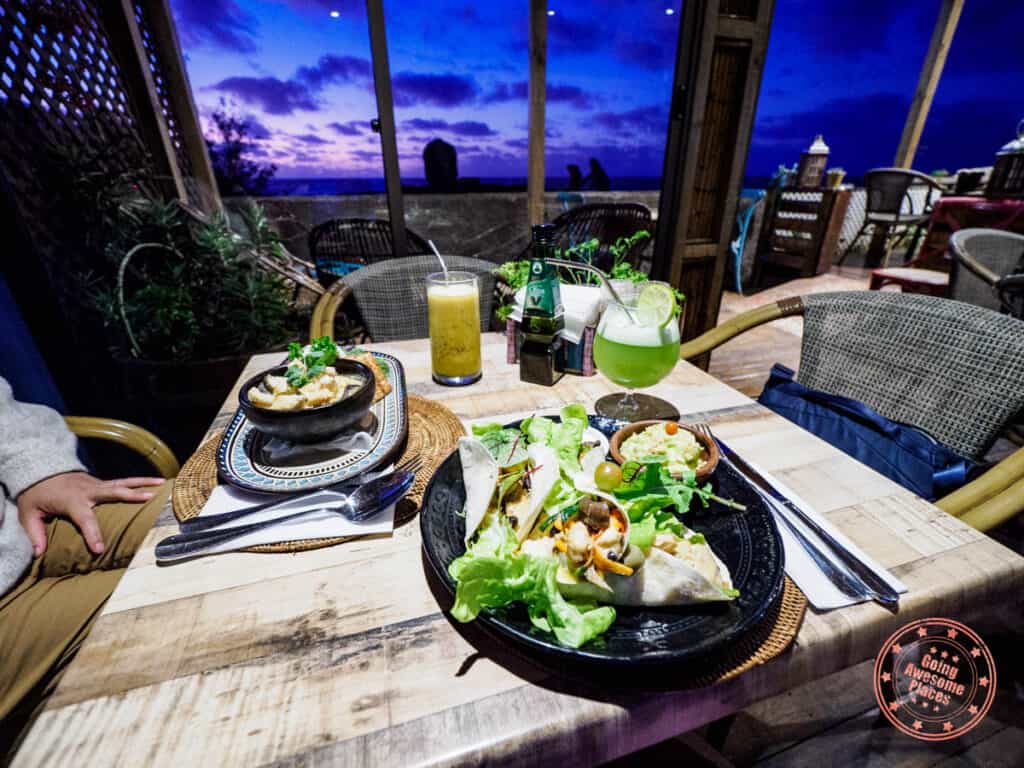
For dinner, head to Polynesian Coffee and Tea, a gem of a restaurant that comes highly recommended by locals. As a bonus, they have quite a few healthy food options and is quite affordable.
Whether you sit inside or outside, the restaurant has great views of the sunset.
Day 7 Summary
What you’ll see:
- Ahu One Makihi
- Rano Raraku
- Ahu Tongariki
- Pu’o Hiro
- Papa Vaka
- Mercado Artesanal
Where you’ll eat:
- Breakfast – Takarua Lodge – Light breakfast before diving.
- Lunch – La Taverne du Pecheur – Near the dive shops in Hanga Roa Harbor and offers a wide selection of freshly caught fish.
- Snack – Mikafè – Cafe by Hanga Roa Harbor that has a great selection of ice cream.
- Dinner – Polynesian Coffee & Tea – Casual restaurant that focuses on healthy food options and is one of the more inexpensive eateries in town.
Where you’ll stay:
Day 8: North Coast Adventurer

When asking Green Island Tours what we should do if we could only choose one hike, Marc, the owner, said the North Coast Adventurer. This is a full day hike that takes you through a path that not many get to take.
The start of the hike isn’t too far from Hanga Roa. Taking the road north along the west coast, you’ll go as far as the road will take you and the rest is on foot. You won’t start by hugging the coast but the path eventually leads you there. You’ll finish the hike near Anakena.
Without spoiling all of the surprises along the way, there are ahu, moai, caves, petroglyphs, blowholes, abandoned farms, and possibly a lot of cows.

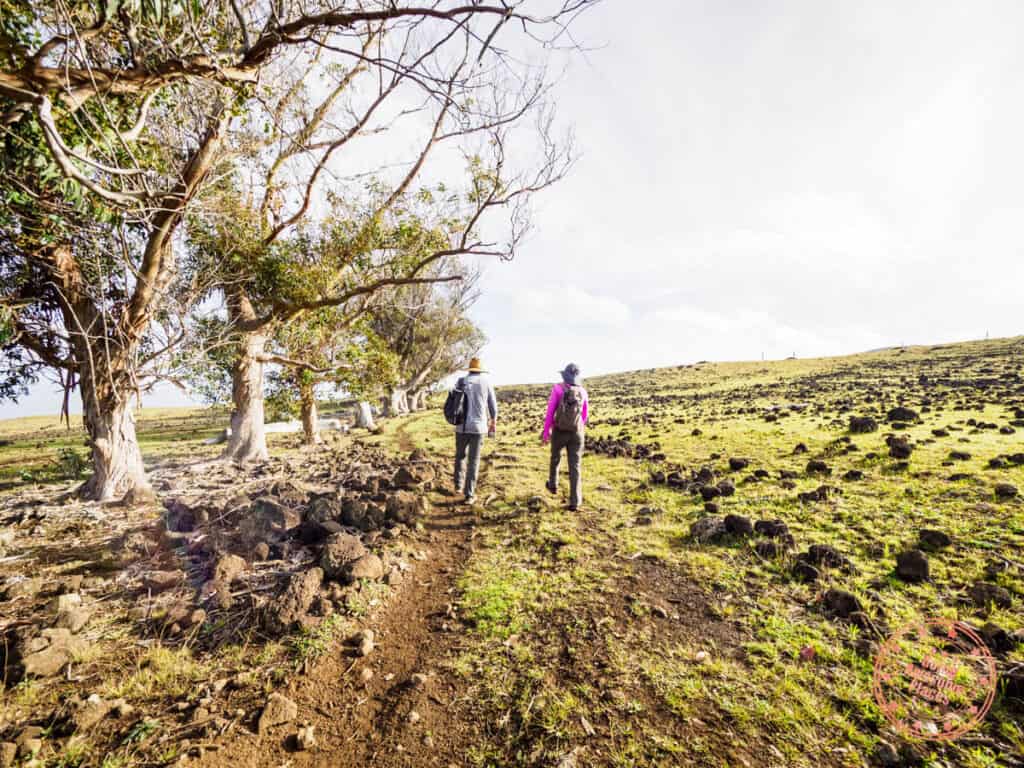

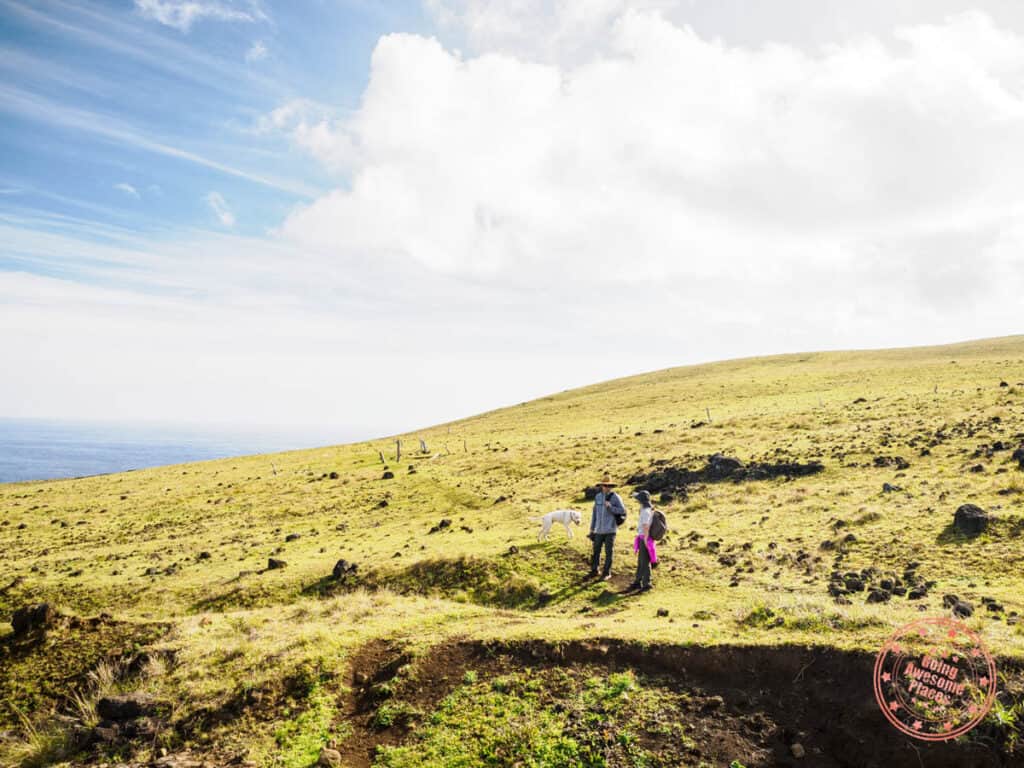
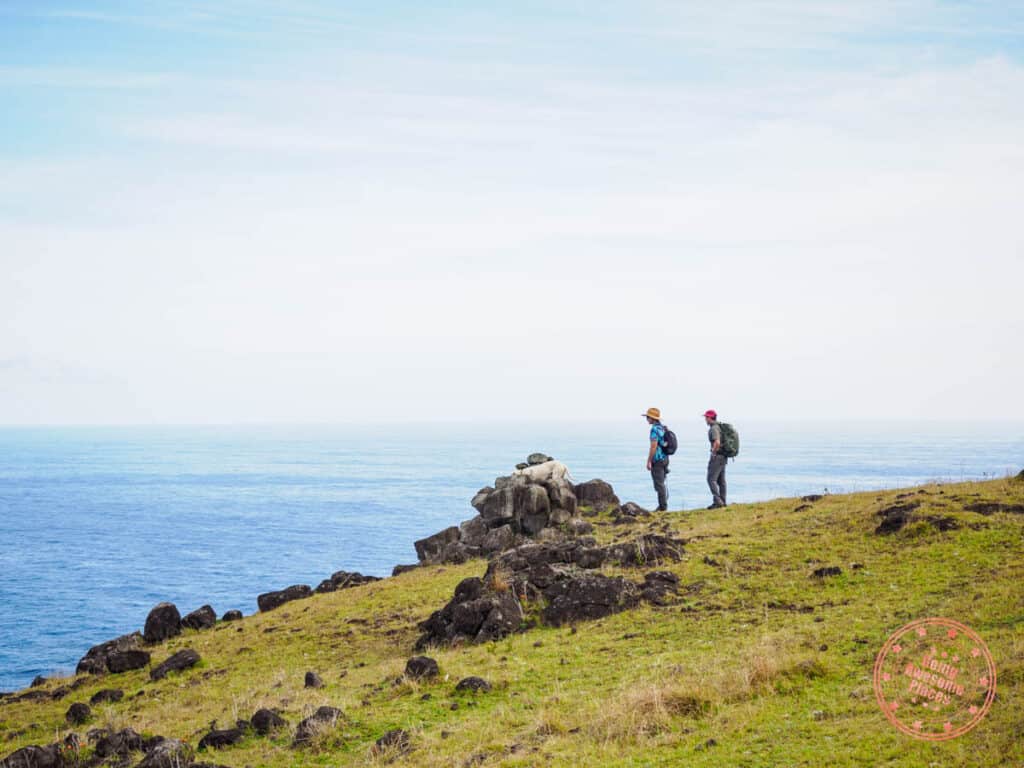
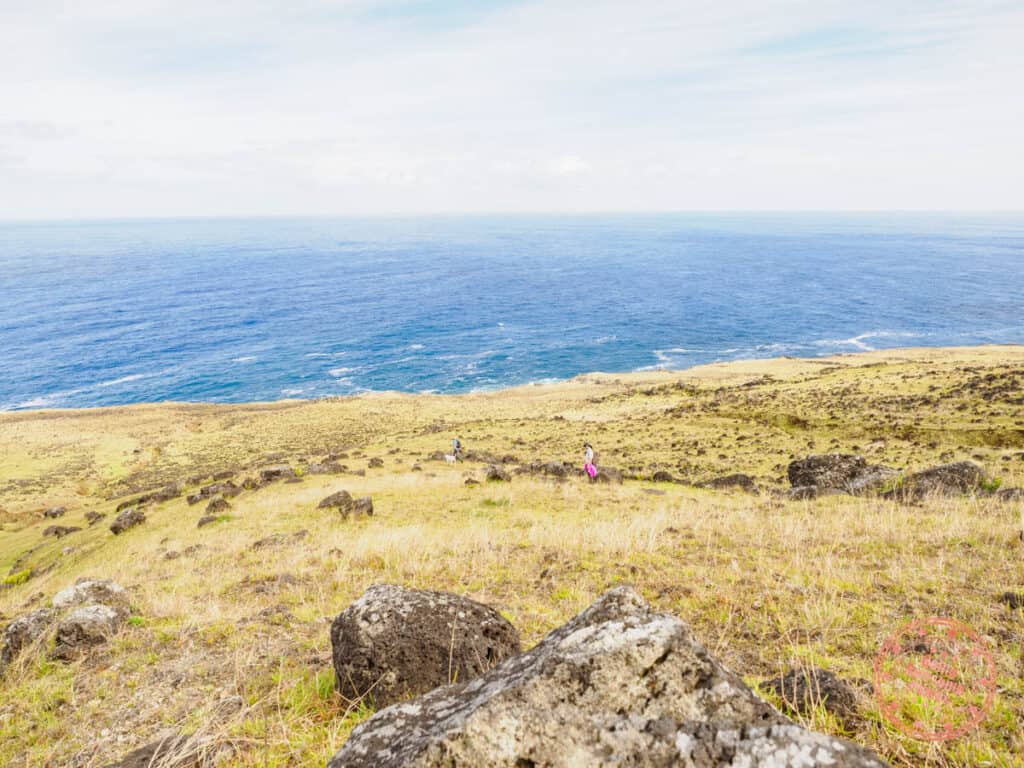


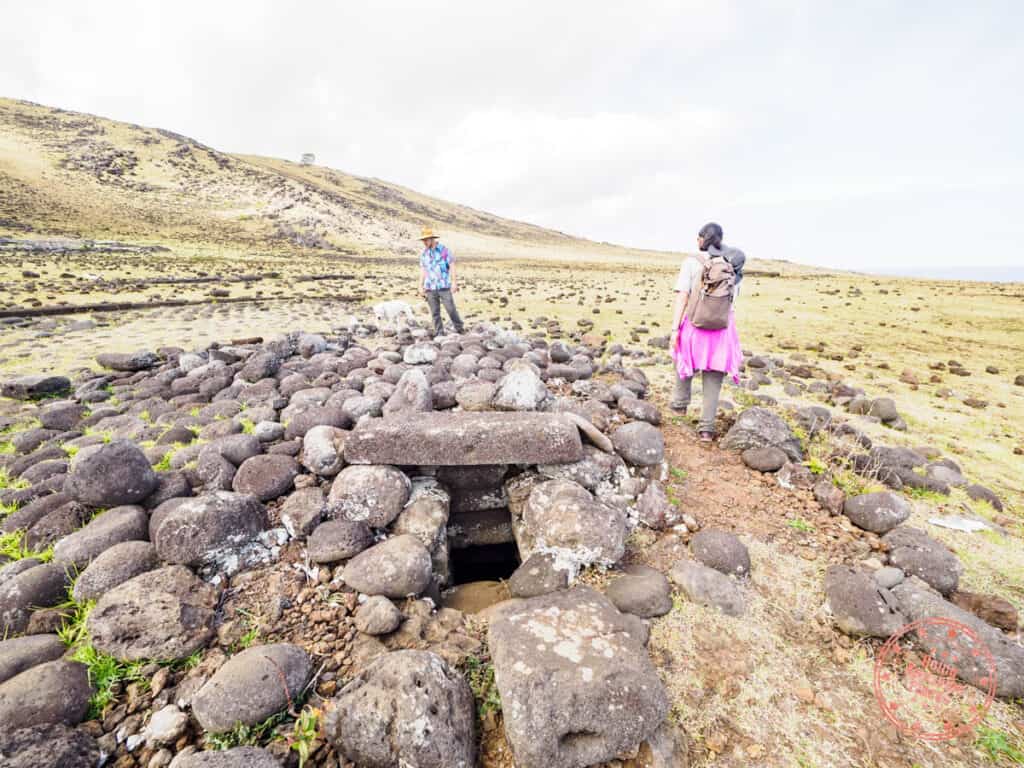

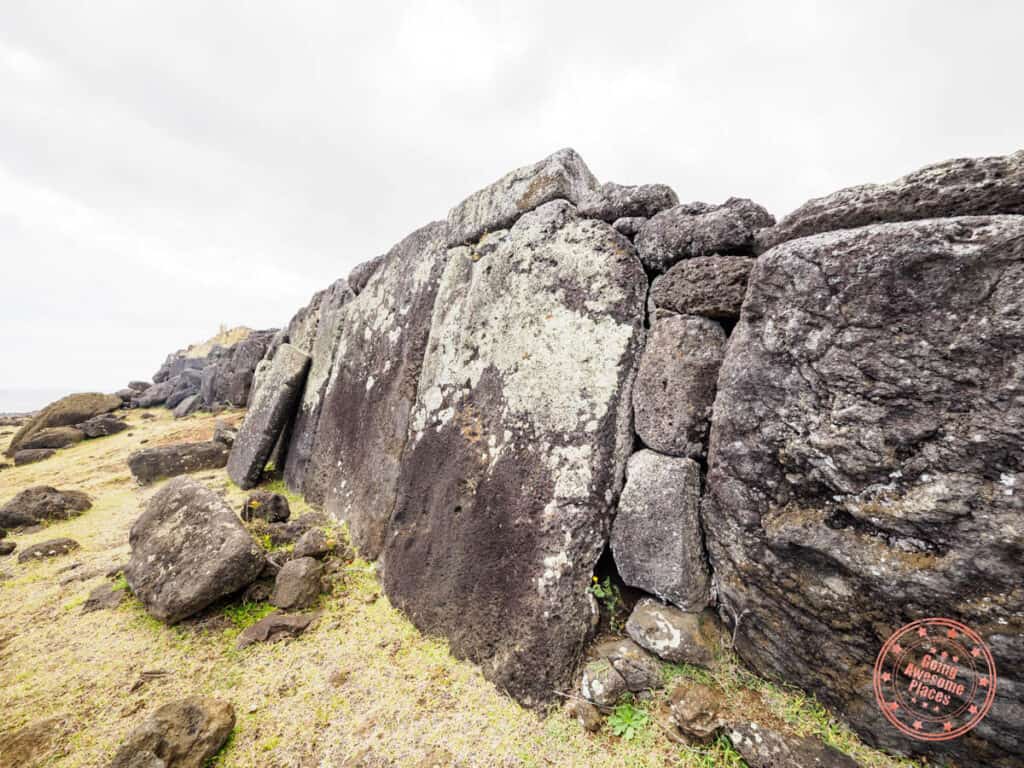


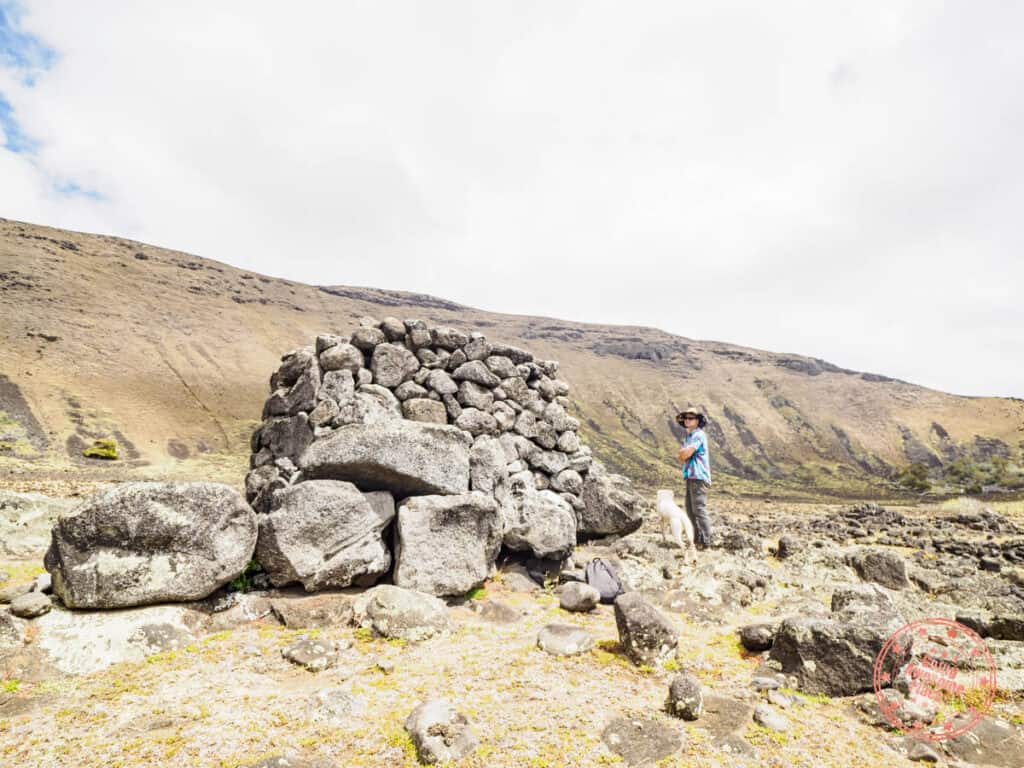


What will make this a memorable hike for you is simply how untouched this part of the island is. There were clearly Rapanui villages here but when you think about how this is the farthest distance from the Rano Raraku quarry, your mind gets blown with every moai you see.
WHAT YOU NEED TO KNOW
How the hike works: This is a one-way hike. As a result, the guide and a separate driver will accompany you to the start of the hike. The same driver will then pick you up on the other side.
Where: When it comes to the north coast, Google Maps is either useless or inaccurate. Taking the GPS coordinates of the photos we took, I’ve replicated this in our map to give you a sense of the things you’ll see. We’ve tried to do our best with the names as well but there isn’t a lot of information about them.
Time: Pick up for the hike varies throughout the year – starting as early as 7:30AM in the summer (to avoid the hottest parts of the day) or 9AM in the cooler months.
Difficulty: Medium – The North Coast Adventurer hike isn’t a challenging a hike as there’s not too much elevation gain and the terrain is quite flat. That said, it’s still 6-7 hours and you’ll want to have good shoes and at least 2L of water per person, ideally through a hydration reservoir in your backpack. If you’re coming from Patagonia, you should have everything you need!
Tips:
- Hiking poles like the Black Diamond ones we used in Patagonia aren’t necessary for this hike.
- While it’s possible to do the hike on your own as you’re following the coastline, since this is one-way, it’ll be a challenge to coordinate a pick up in Anakena (although not entirely impossible). The path itself is also not the most defined as it’s mostly open space. This means that it’s very easy to miss sites if you don’t know the right way. This is why we highly recommend doing this with a guide.
- Aside from 2L of water per person and good shoes, make sure you put on and reapply sunscreen and wear a good hat.

For dinner, you’ll walk across the hotel to Te Moai Sunset. They probably have one of the best reputations on the island and we certainly enjoyed the view but to be honest, the food was good but weren’t blown away, especially at their price.
TIP: The second floor of Te Moai Sunset only has 4 tables and are often reserved so if you’re looking for spot up there, make reservations earlier in the week.

As your last night on Easter Island, take in that beautiful sunset one last time from within Tahai. After everything you’ve seen all 9 days of this itinerary, there’s really nothing that beats it.
Day 8 Summary
What you’ll do:
What you’ll see:
Where you’ll eat:
- Breakfast – Takarua Lodge
- Lunch – Granola bars and snacks from home.
- Dinner – Te Moai Sunset – Located across from Takarua Lodge, they have a great view of Tahai from their second floor.
Where you’ll stay:
Tips:
- Check-out procedure – Confirm with the front desk when you need to check-out by and when the airport transfer is.
- Prepare your gear for the sunrise – Make sure everything’s ready to go and your lenses are cleaned.
Day 9: Tongariki Sunrise and Goodbye

Even though it’s your last day, there’s room for one more spectacle.
You’ve seen Ahu Tongariki in a number of ways on this trip so far, but you haven’t seen the sun rise from behind the towering moai, one of the iconic experiences of Easter Island.
There are two ways to go about doing the sunrise:
- Go with a guide – You need a guide to get into Tongariki so this would be the easiest way to do it. Green Island Tours offers a Tongariki Sunrise tour.
- Drive yourself – If you have a rental car, you can still get in. Some guides are nice enough to ask if you want to join their group to go inside. You can also ask and they’ll likely let you go in with them
The gates open at 7AM so plan to arrive at 6:45AM so you can survey the situation. You’ll need to show your Rapa Nui National Park ticket.
Once you’re in, you’ll have the entire space of Tongariki to work with. You can walk to the back near the wall and petroglyphs if you want to see the wide angle view of the sunrise or you can get to the front, near the platform.
Whether you’re focused on photography or just here to enjoy the show, feel free to roam around the space and see it from multiple angles.
Make sure to stay beyond the sun peeking through the horizon. It will continue to climb and eventually plays peek-a-boo with the 15 moai and casts mesmerizing shadows on the grass.
While you’re here, we also recommend taking a look at all 15 moai from behind and across the inlet of water. If you didn’t do it the first time around, it’s quite the sight to see this with Rano Kau as the backdrop.
WHAT YOU NEED TO KNOW
Time: Plan to leave your hotel at 6:15PM (30 minute drive to Tongariki). They allow people in starting at 7AM. Expect to stay until 8:45AM – 9AM.
Tips:
- You’ll be driving in near-darkness towards Tongariki so be careful of animals on the road.
- There’s no need to rush once the gates open as there aren’t that many people that go for sunrise.
Photography:
- A majority of photographers set up near the front and very few are near the back.
- For those that are looking to do a timelapse, there will be many people roaming near the front so we recommend you set up a small tripod close to the front border or put on near the back wall where there will be low chances of someone walking in front of it or knocking it over.
- The sun moves quickly and the conditions change quite quickly. A tripod is mandatory but be ready to adapt to the situation and expect to move around.
- It’s quite challenging to get a wide shot of Tongariki without anyone in it so you have a few choices: 1) Compose the base of the platform at the bottom of your frame so you cut people out, 2) get up close to Ahu Tongariki and shoot upwards, or 3) work the people into your composition.
- When photographing up-close, since Tongariki is very wide, you’ll want to switch to an ultra-wide-angle lens such as the OM System 8-25mm paired with OM-1 camera body (our go-to travel camera set up).
- A good lightweight travel tripod we recommend is the Peak Design Travel Tripod in Carbon Fiber.
- For a nice starburst, you’ll have to increase your F-stop to F/8 or higher.
- Remember to clean your lenses the night before.

For those that have a car rental, remember to fill up the tank as you enter into town. This is also your last chance to visit any remaining attractions that you may have missed. On our list we wanted to get a closer look at the church (Church of the Holy Cross) in Hanga Roa, drop off our postcards at CorreosChile, and take a quick peek at Ahu Hanga Kio’e.
After a busy morning, return to Polynesian Coffee & Tea to try their excellent breakfast menu.
If you don’t have a lot of things in the car, you can head straight to the car rental agency (Insular in our case) and walk back to the hotel.
After checking out of your room, your airport transfer should be roughly around 1PM. Anyone else flying out that day will also be on the same schedule.
As a nice added touch, we received a small moai necklace gift before getting on our airport transfer from Takarua Lodge.
The check-in process at Mataveri International Airport with LATAM is as seamless as can be. Security is also quite standard with the exception of the PDI (police) booth but they simply double check your documents and let you through.
In the terminal, their seating spaces are spread out but we found that there isn’t enough for everyone. Not to worry though, as there’s a courtyard as part of the open-air space where you can sit on the grass. This area is also great for watching the incoming plane come in as it faces the runway.
And just like that, you’ll realize how quickly 9 days have gone by and how another epic trip is in the books!
Day 9 Summary
What you’ll see:
- Ahu Tongariki sunrise
- Church of the Holy Cross
- CorreosChile
- Ahu Hanga Kio’e
Where you’ll eat:
- Breakfast – Skipped
- Brunch – Polynesian Coffee & Tea – As good as their dinner is, their breakfast menu is even better with a delicious selection of options like smoothies, croissants, health bowls, omelettes, and hot cakes.
Where you’ll stay:
Tips:
- Remember to fill up – Fill the car rental’s tank at the island’s only gas station.
- Returning your car rental – Think ahead of time about how returning your car rental will work. You can ask if dropping off at the airport is possible. Otherwise, you’ll have to return your car and walk back to the hotel to take advantage of the included airport transfer.
- Drop off your post cards – We didn’t see a mailbox at the airport so we’d recommend that you drop by CorreosChile on your last day.
- Remember to tip – Leave a tip for the the great housekeeping staff at the hotel and have another ready for your airport transfer driver.
Is 9 Days on Easter Island Too Much?
We’ve received many comments about how 9 days seems a bit too long to spend on Easter Island. After all, when you do your research, most tours seem to be 4 days or thereabouts.
Here’s why we believe that 9 days is the perfect amount of days:
- Room for exploration – While the new rules mean that you have to visit the major sites with a guide, as you’ve seen from our itinerary, there are plenty of way s
- Enjoy island time – If you spend a short amount of time here, you’ll be rushing through all of the archeological sites but not actually getting into the flow of what it’s like to live on the island which is much slower and laid back. Free days to roam allow you to do this.
- Scuba diving – With scuba, you can’t do it 24 hours before your flight out so you really need days in between to work with. If you plan on doing this, you easily need 6 days or more if you want to fit everything in.
- Life’s a beach – Along the lines of island life, a visit to Anakena and Ovahe beach are must.
- Do more than the regular tourist – 9 days allows you to insert a couple of hikes that allow you to go off-the-beaten-path.
- Flexibility – Bad weather and other unexpected things can happen and the ability to move things around is really helpful as we experienced first hand.
How You Could Tweak This Easter Island Itinerary
If you like a lot of what you see in this 9 day Easter Island itinerary but are seeking to change it up a bit. We’ve compiled a list of other options that are available on the island that you can easily swap in.
Here are a few alternatives that are worth considering:
- Terevaka Summit Hike – One of the big hikes we couldn’t fit in was the hike to Easter Island’s highest point to take in the full 360 degree view. You can do this as a day hike or night hike.
- Hidden Treasures of Easter Island – Instead of renting a car to see a lot of these spots on your own, you can join this tour that does a lot of the same things.
- Boat Trip to Motu – We were able to see the islets from Orongo but would have loved to have taken a boat ride out to get right up to the them. You can charter a boat to get out there if you speak to locals or you can book a tour like this one. Dive operators like Mike Rapu also offer this but they’re not well-promoted.
- Poike Peninsula – Another off-the-beaten-path hike we could’ve done was this one that takes you the eastern corner of the island that many don’t get to see.
- Explore More Caves – We really tried to squeeze in a visit to Ana Kakenga where you’ll find lava tubes that look like windows looking out to the Pacific Ocean. Summit to Subterranean is a tour that allows you to see many of the island’s caves.
- Biking – A unique way to explore the island is to rent a bike. We’ve read that people have taken their bikes all the way out to Anakena Beach so it’s definitely possible.
- Horseback Riding – We love the idea of horseback riding on the island but ultimately opted to take it a bit more easy on our trip. That said, you can totally do an amazing horseback riding tour that goes up to the summit of Mount Terevaka.
- Massage – At Takarua Lodge, they promoted a spa called Sansara Masajes where 60 minutes is $35,000 CLP for a relaxation massage, $45,000 CLP for a deep tissue massage, $35,000 for reflexology, and $60,000 CLP for a 90 minute hot stone massage.
Map of Easter Island Itinerary
More than our trip to Atacama and Patagonia, accurate locations and names of places is a tricky thing on Easter Island. That’s why we’ve put together a comprehensive Google Map broken down by each day of the itinerary which marks every location.
TIP: To use this map as your own, first maximize the map to open it up in a new tab. From there, go into the menu and select “Copy map”. From there, you’ll be able to make your own adjustments and open it up in the Google Maps app as well. Just beware that custom Google Maps pins can’t be saved for offline use.
6 Must-Know Easter Island Travel Tips

When we think about our 9 days in Easter Island and the combination of things we wish we knew before we went and also some realities of traveling there, these are our best tips that you’ll want to know before you go.
- Pick a good tour company – With guides being mandatory, we’re glad we had the experience we did with Green Island Adventures. Having a good guide can make or break the experience especially when there’s so much history and education required to understand what you’re seeing at each archeological site.
- Prepare for terrible internet – Before going, we read that it was bad but we didn’t realize that it would be that bad. Before you leave for Easter Island, make sure you download as much as you can offline (i.e. important documents, movies, TV shows, and app data).
- Have buffer days to factor in bad weather – Whether it’s cloudy days that ruin stargazing, rain that would make visiting moai quite miserable, or rough waters that put a pause on scuba diving, the advantage of staying longer is that you can easily move things around.
- Some things just aren’t that reliable – Aside from the wifi, we encountered a few head-scratching moments on the island such as guards not showing up for work, sites closing early, the official office shutting down their computers 30 minutes before closing (hence not being able to buy tickets), and the tourism office hours not being accurate. I guess you could say that time management isn’t one of their strengths.
- WhatsApp – If it’s your first time to South America, this’ll catch you off guard but if you want to get in touch with any business and hear back in a timely fashion, you’ll have to connect with them through WhatsApp and not email, not Facebook, not Instagram, and certainly not through their website.
- Staying near Tahai is a good idea – While certainly not mandatory, you’ll love having the ability to see the sunset in Tahai on a whim every night. While Hanga Roa is small, there’s still a considerable distance to walk from one end to the other so choose your accommodations wisely.
For a thorough list of our tips and best advice, make sure to read our visiting Easter Island travel guide.
How Much Does This Easter Island Itinerary Cost
There are certainly levels when it comes to how you put together a trip to Easter Island. We’d categorize this as middle of the road – splurging on certain things like scuba diving and a better hotel but not necessarily going all out with a something like Explora and doing fancy meals every night.
To give you an honest sense of how much a trip to Easter Island costs is, here’s how much we spent for our 9 day Easter Island itinerary.
Actual itinerary costs
Here’s what we actually spent (prices are in USD) and for two people:
| Expense | Cost (USD) |
|---|---|
| Flight | $1635.47 |
| Guide | $1430.00 |
| Accommodations | $1106.17 |
| Food | $550.19 |
| Activities | $316.90 |
| Transportation | $249.85 |
| Tips | $51.08 |
| Souvenirs | $46.01 |
| TOTAL | $5,385.68 |
The only thing that’s missing here is the Entel SIM card which I purchased in the Patagonia portion of the trip.
Trip cost per person = $2,693 USD
This breaks down to $299 USD per day per person. For reference, our 6 days in Atacama was $240 USD per person per day.
Who Is This Itinerary For?
We gave a broad strokes view of this at the very beginning beginning of this Easter island itinerary but let’s carve out some space to delve into this a bit more.
What type of traveller will really enjoy their time on Easter Island?
This itinerary is built for someone who:
- Interested in archeology and more specifically the story of the moai.
- Okay with the fact that you have to go with a tour guide.
- Loves the thrill of exploring with your own car.
- While loving adventure, also looks for a balance of comfort, good food, and relaxation.
- Wants to have control of the itinerary as opposed to being led around by large bus tours.
- Willing to spend more time in one place as opposed to rushing through everything.
- Photographers.
This is not for someone who:
- Wants to rush through Easter Island just to check it off on your bucket list.
- Prefers to travel independently with a car.
- On a budget and looking to travel on the cheap.
- Seeking a luxury experience although that is easy to incorporate by staying at Explora en Rapa Nui or you can book an EcoChile Easter Island tour.
Save Money with EcoChile

Looking for a packaged tour where you can be more hands off with planning and allows you to see all of the main sights? This 4 day Easter Island tour is an excellent option. This package includes accommodations, activities, airport transfers, entrance fees, and breakfast.
Save up to 5% – We’ve partnered with EcoChile to offer you 5% on all pre-packaged tours (not just Easter Island). You can also book a custom tour but the discount will vary. Simply put your inquiry through our form below!
Closing Thoughts
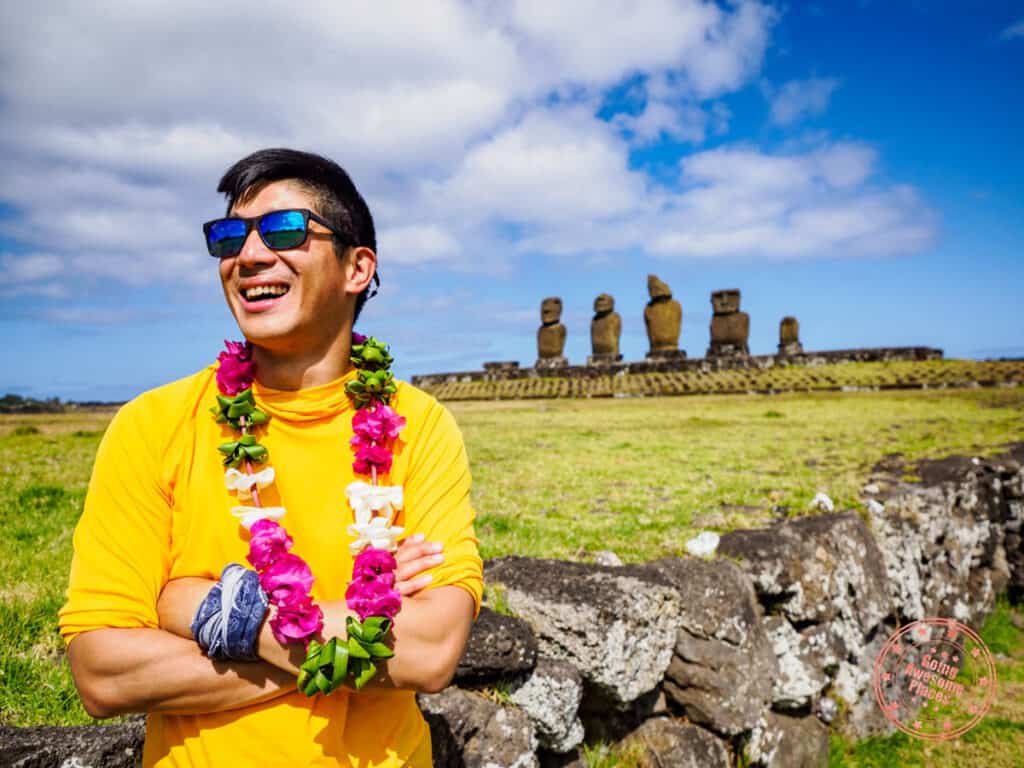
Easter Island is a destination that is unlike any other. What you think you know about this tiny and remote Polynesian island from its iconic photos is just the tip of the volcano.
Every day we peeled away more layers of the incredible story of Rapa Nui, the rise and fall of a civilization, and all the big and small mysteries that comes with this truly one-of-a-kind archeological wonder.
Without a doubt, the highlights of the trip were:
- Rano Raraku and seeing all of the moai in all steps of completion in the quarry.
- The massive scale of Tongariki and being able to watch the sunrise from there.
- Feeling like Indiana Jones, stumbling upon artifact after artifact, while hiking the north coast.
- Sunset at Tahai even after the 5th time.
Despite some of the changes in the rules for the national park, we surreptitiously stumbled upon a great way to build a 9 day Easter Island itinerary that allowed us to see the island from so many perspectives, and be able to do it in multiple ways, and without much compromise or a whole lot of stress.
Frequently Asked Questions
Yes, you can absolutely visit Easter Island. It is part of the country of Chile and you can only get here through flying from Santiago.
The only way to get to Easter Island is by flight from Santiago, Chile with LATAM Airlines. There is no other way. This is detailed in our how to get to Easter Island guide.
You can have a drone in your bags but you are not allowed to fly a drone on Easter Island.
The best time of the year to go is during its shoulder seasons when there are less visitors than at its peak. These are the months of April to June and October to December. This is also when prices are lower.
Yes, being a small island and as remote as it is, Easter Island is incredibly safe.
At a minimum you need at least 5 days on Easter Island but the ideal trip is 9 to 10 days.
Easter Island is a special territory of Chile which makes it politically in South America, however, being located in Polynesia, it is in the continent of Oceania.
The best way to plan a trip to Easter Island is through reading a comprehensive guide on visiting Easter Island, deciding how many days you want to go for, booking flights and hotel, picking a local tour guide, and building out a broader trip to Chile.
With this Easter Island itinerary, we’re confident that the details we’ve put into it will allow your trip to go off without a hitch. If you have a question about this trip plan, make sure to drop a comment!
What you should read next
Travel Resources For Your Next Trip
If you’re in the process of planning your trip and putting together your itinerary, these are genuinely the best resources that the Going Awesome Places team stands by 100%.
Flights: Of all the booking search engines, Skyscanner is the most helpful and easy to use thanks to their Everywhere feature.
Car Rental: If you’re looking to save money, these car rental coupon codes will be a true game-changer. Otherwise, DiscoverCars and RentalCars are great places to start.

Airport Parking: You’ll need a spot to leave your car at the airport so why not book a spot at a discount. Use code AWESOME7 to get at least $5 off at Airport Parking Reservations or Park Sleep Fly packages.
Data: We’ve been a huge fan of wifi hotspot devices like PokeFi because their rates are so good and you can use it globally but recently, we’ve really loved using eSIMs. The best one is Airalo. Save money by getting region-specific eSIMs and use referral code WILLIA9500 to get $3 USD credit on your first purchase. Ubigi is another one that we’ve had success with where they uniquely offer 5G coverage. Use code AWESOME10 to save 10% on your first order.
Hotels: Our go-to is Booking.com because they have the best inventory of properties including hotels and B&Bs plus they have their Genius tier discounts. The exception is Asia where Agoda always has the best prices. TripAdvisor is also useful for reviews and bookings.
Vacation Rentals: Your first instinct will be to check Airbnb but we always recommend checking VRBO as well if you’re looking for a vacation rental.
Travel Insurance: Learn how to buy the best travel insurance for you. This isn’t something you want to travel without.
- Insured Nomads – Popular insurance provider for frequent travelers and comes with great coverage and special perks.
- RATESDOTCA – Search engine Canadians looking for the cheapest insurance including multi-trip annual policies.
- SafetyWing – A perfect fit for long-term nomads.
- Medjet – Global air medical transportation.
- InsureMyTrip – Best for seniors, families, and those with pre-existing conditions.
If you need more help planning your trip, make sure to check out our Travel Toolbox where we highlight all of the gear, resources, and tools we use when traveling.

![[2024] 9 Day Easter Island Itinerary – Thoroughly Explore Rapa Nui](https://10xtravelblog.com/wp-content/uploads/2023/04/9-Day-Easter-Island-Itinerary-Social.jpg)